智能体的使用
用户可以通过配置LLM、MCP、RAG等工具来定制化用户专属的智能体。
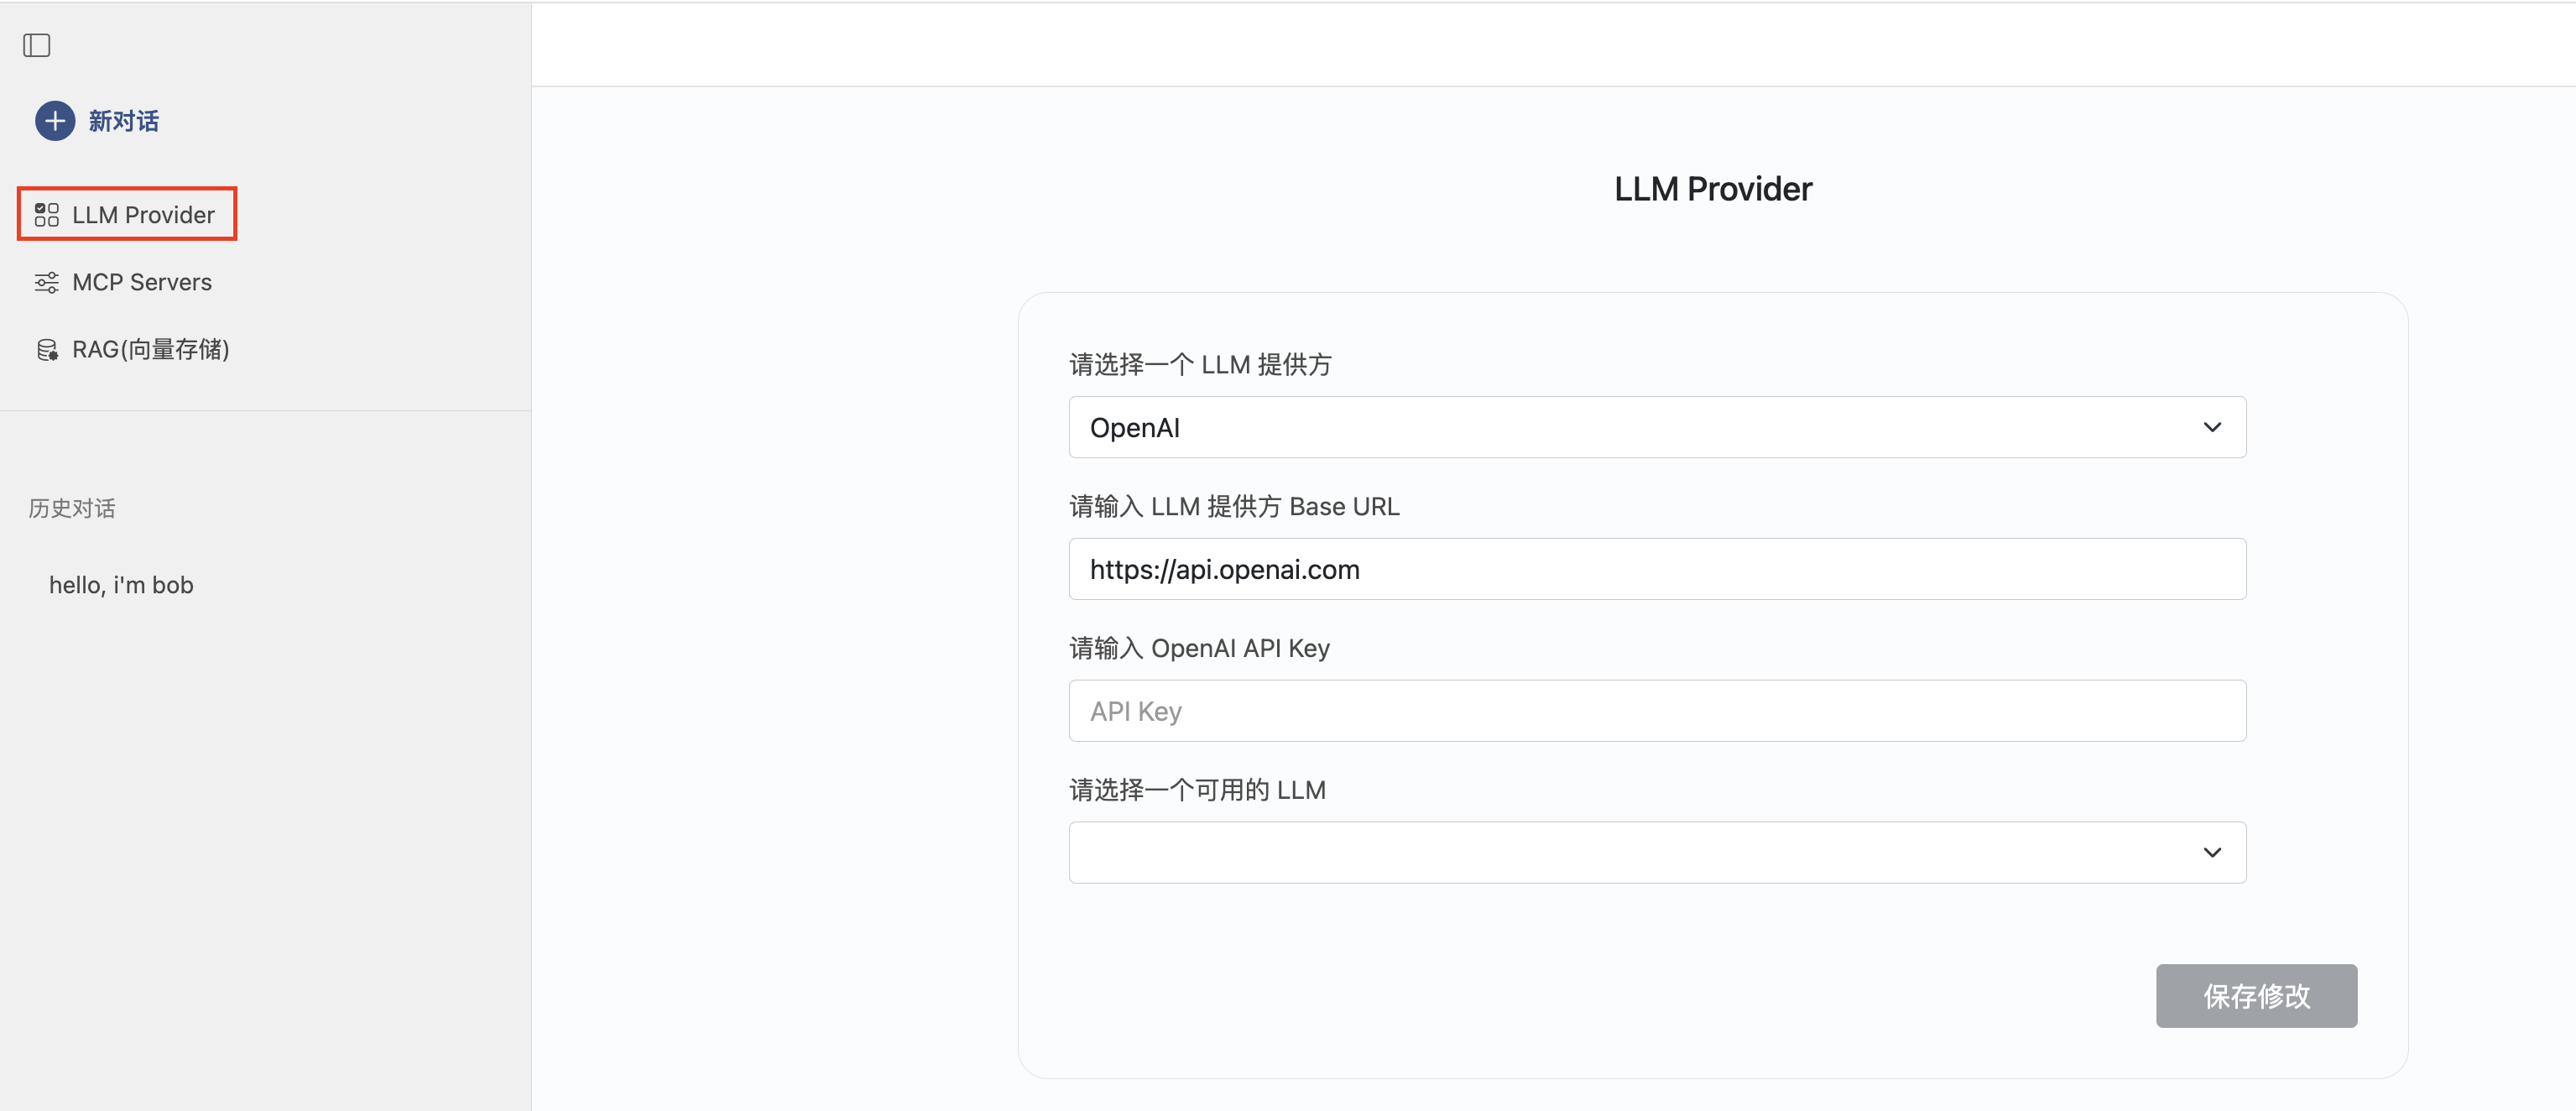
配置LLM(大语言模型)
智能体支持Anthropic, DeepSeek, OpenAI, Ollama作为LLM提供者。其中,Ollama使用本地管理的方式,已内嵌到智能体服务中。
使用外部管理模型
以OpeanAI为例,说明如何配置LLM。
选择OpenAI,输入您的API Key,如果API Key有效,将列出所有OpenAI提供的LLM,选择一个保存,将作为默认被选择的模型。
使用内部管理模型
首先启动一个Ollama Notebook服务。如何启动一个Notebook?

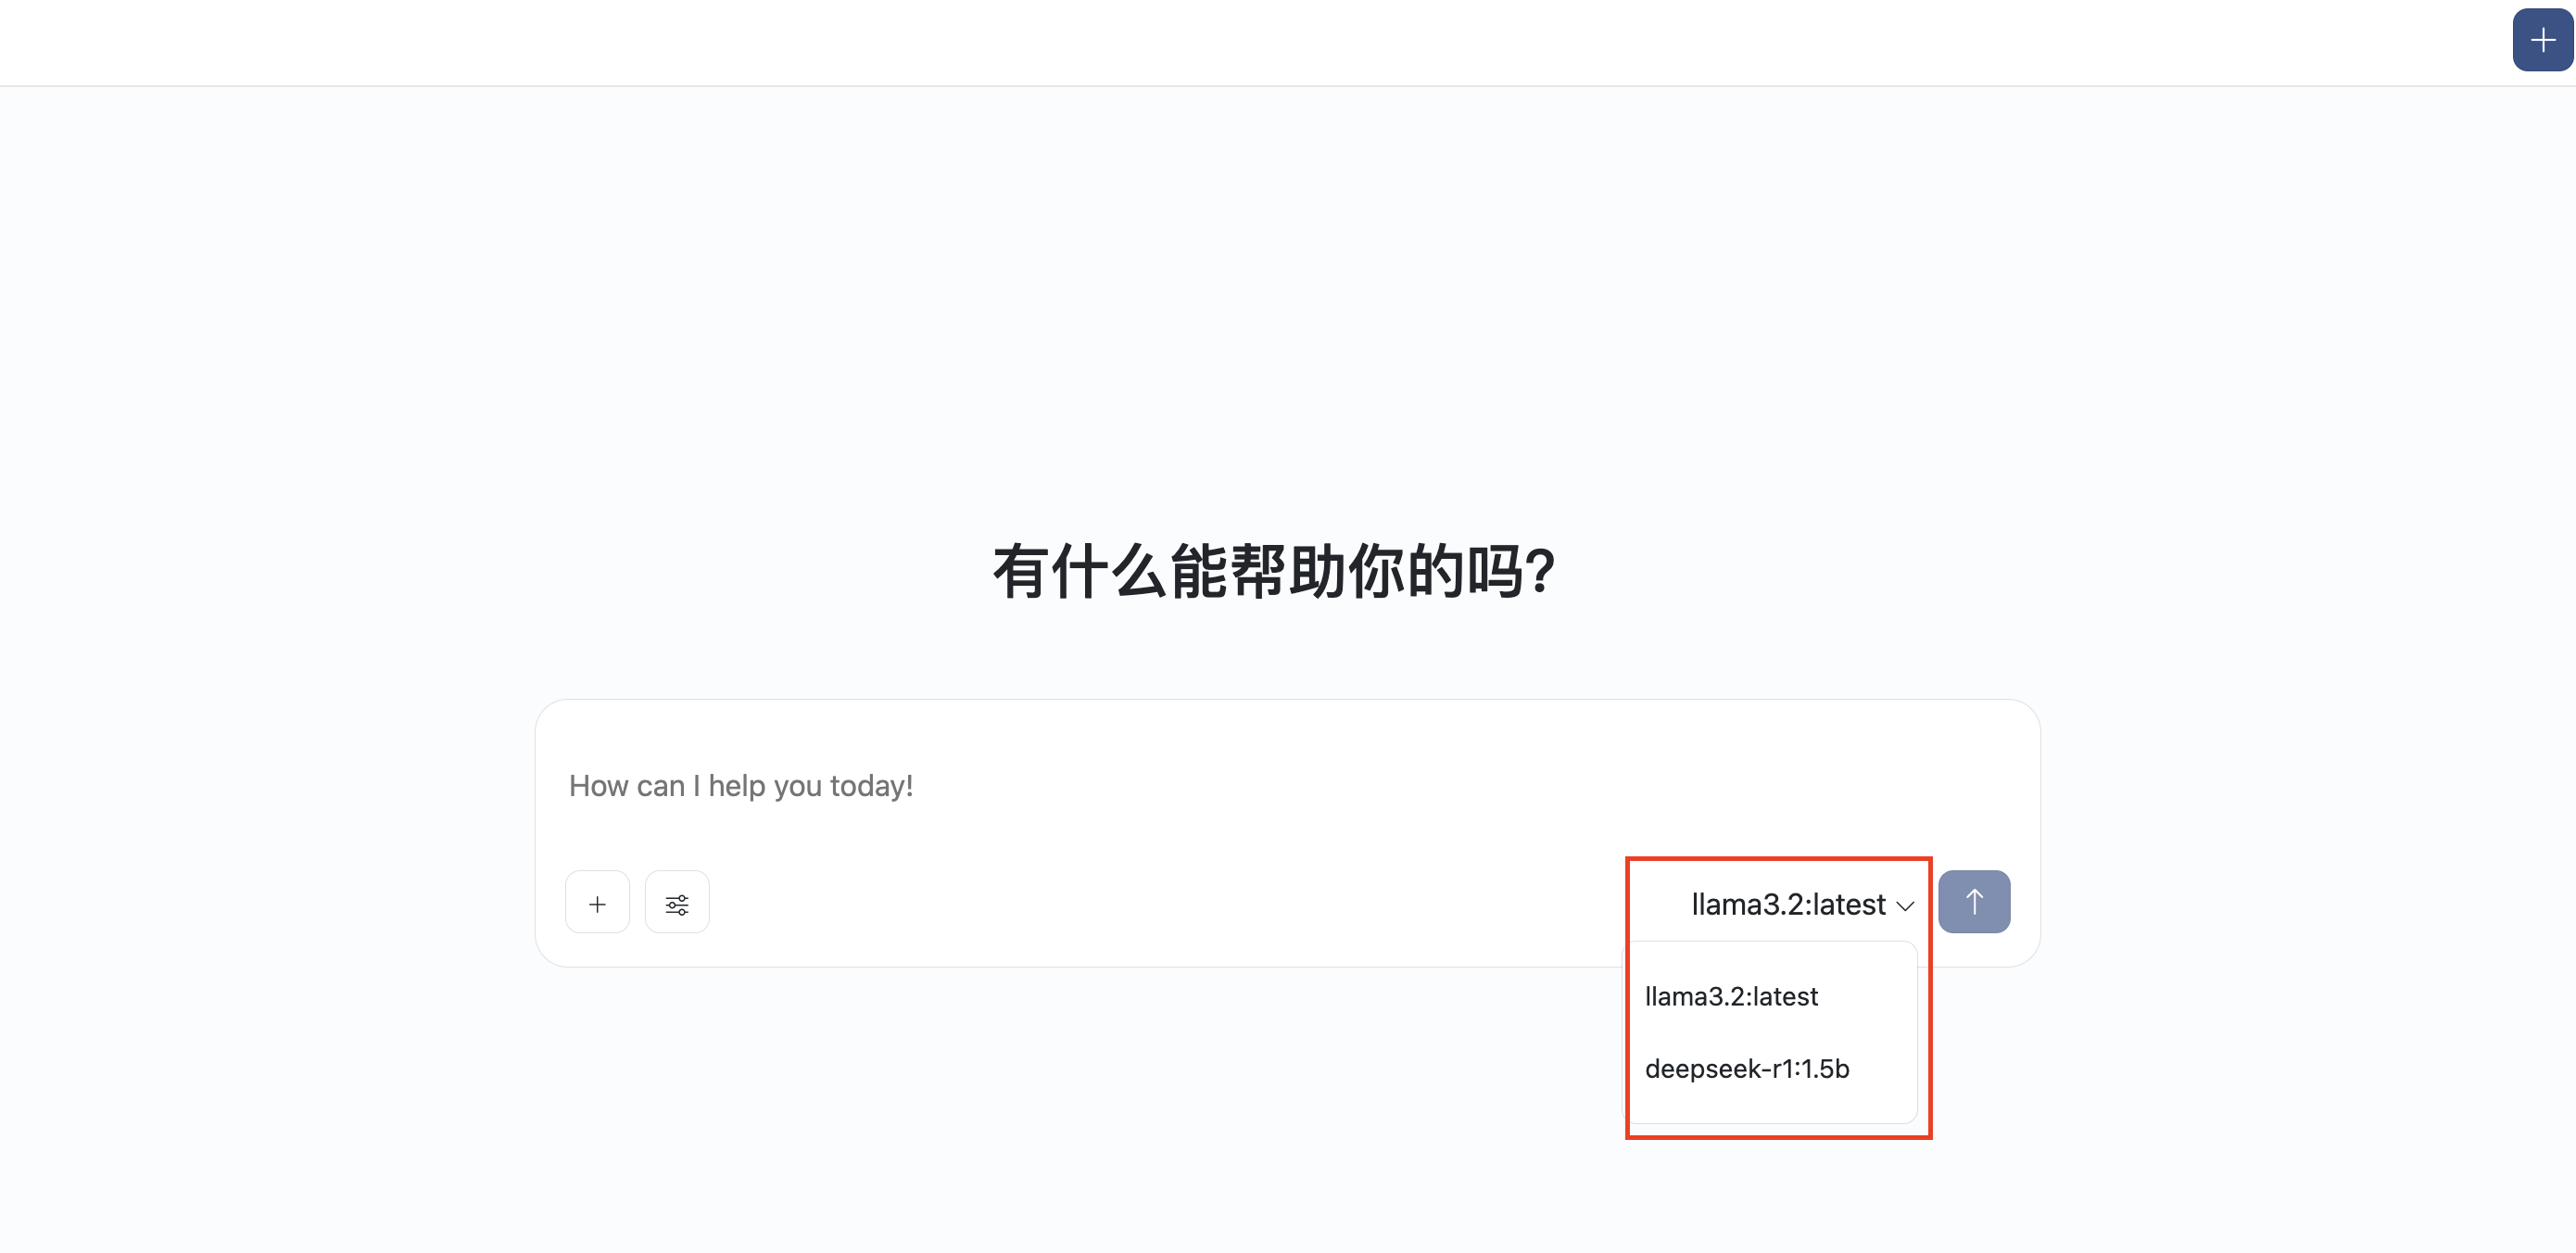
连接进入到Notebook中后,打开命令行终端,运行 ollama pull 命令下载模型。
例如: ollama pull llama3.2:latest

模型会保存到当前Notebook运行选择的工作空间内。
模型下载成功后,会在聊天对话框下显示,你可以在对话时随时切换。
配置使用MCP
安装MCP Server
您可以通过以下两种方式安装部署MCP Server
- 智能体服务本地安装(使用stdio方式)
- 打包部署一个MCP Server服务(使用http streamable方式)
智能体服务本地安装
智能体服务内置两种工作环境,python(uv,uvx)和node.js(npm,npx)。
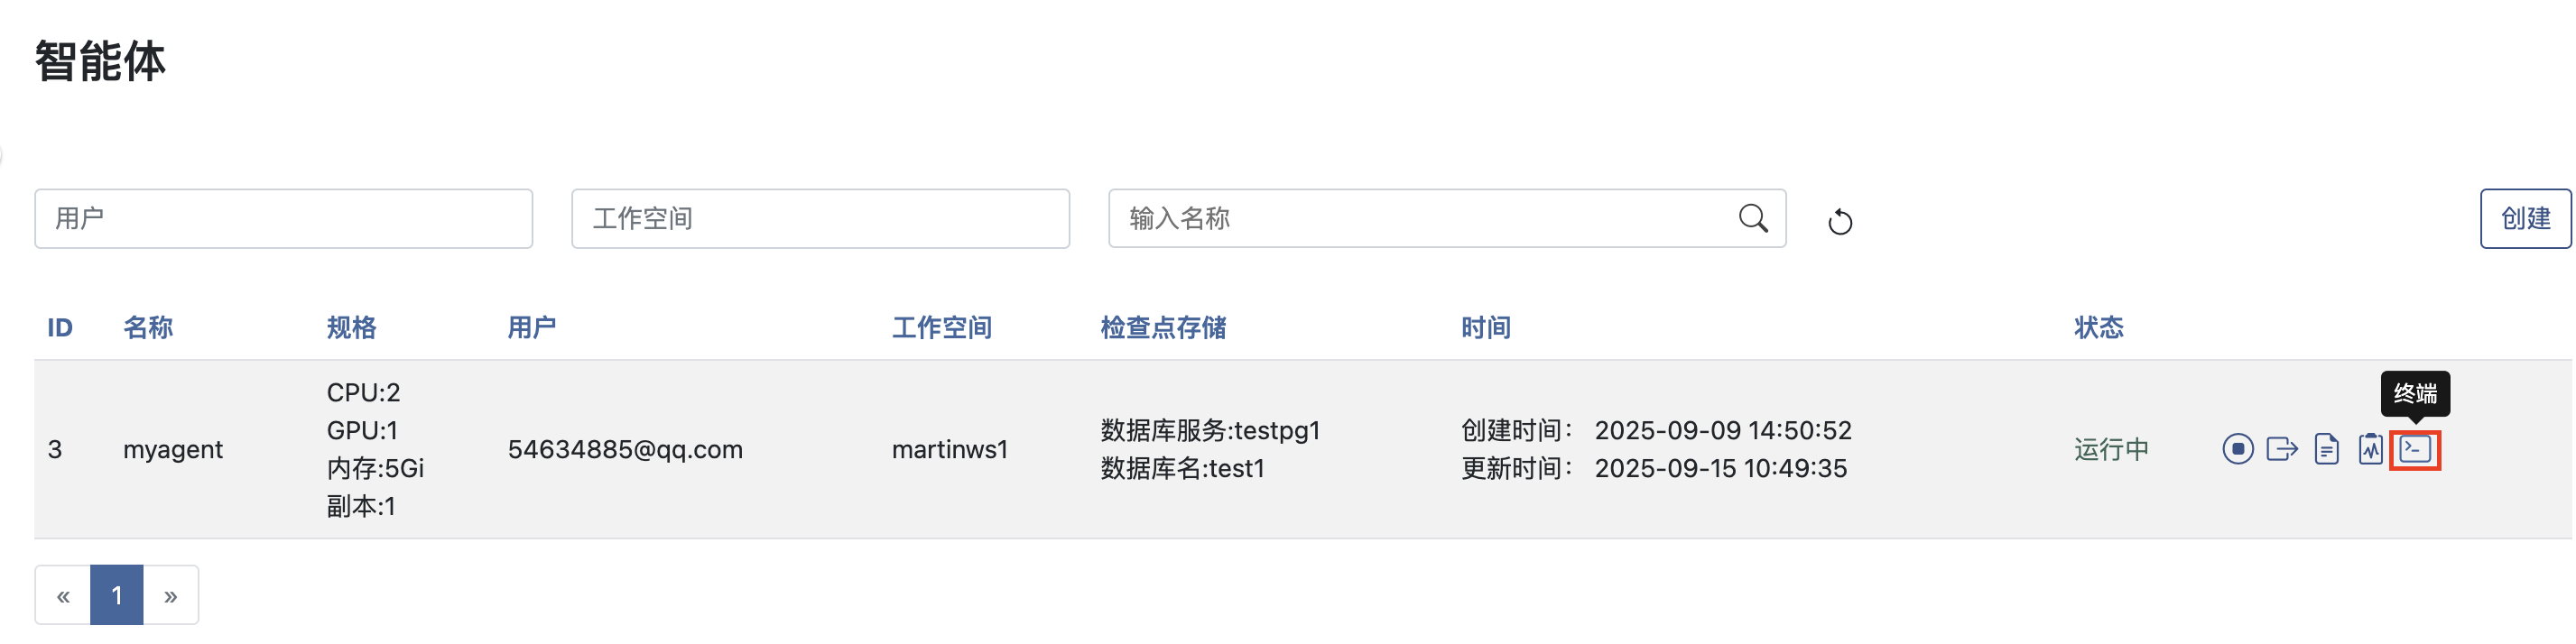
同时,平台提供在线命令行终端,方便您操作。
- python默认的虚拟工作空间在目录
~/.catan/mcp下。 - 通过运行
source .venv/bin/activate命令进入虚拟工作空间。 ~/.catan目录下所有内容都会保存到当前智能体服务选择的工作空间内,持久化保存。

- node.js默认的包安装路径为:
~/.catan/nodejs

使用uv安装一个MCP Server
演示中我们安装一个Postgres数据库的MCP Server,可以用来操作Postgres数据库。
代码仓库地址:https://github.com/crystaldba/postgres-mcp
按照文档的安装说明,运行命令 uv pip install postgres-mcp。

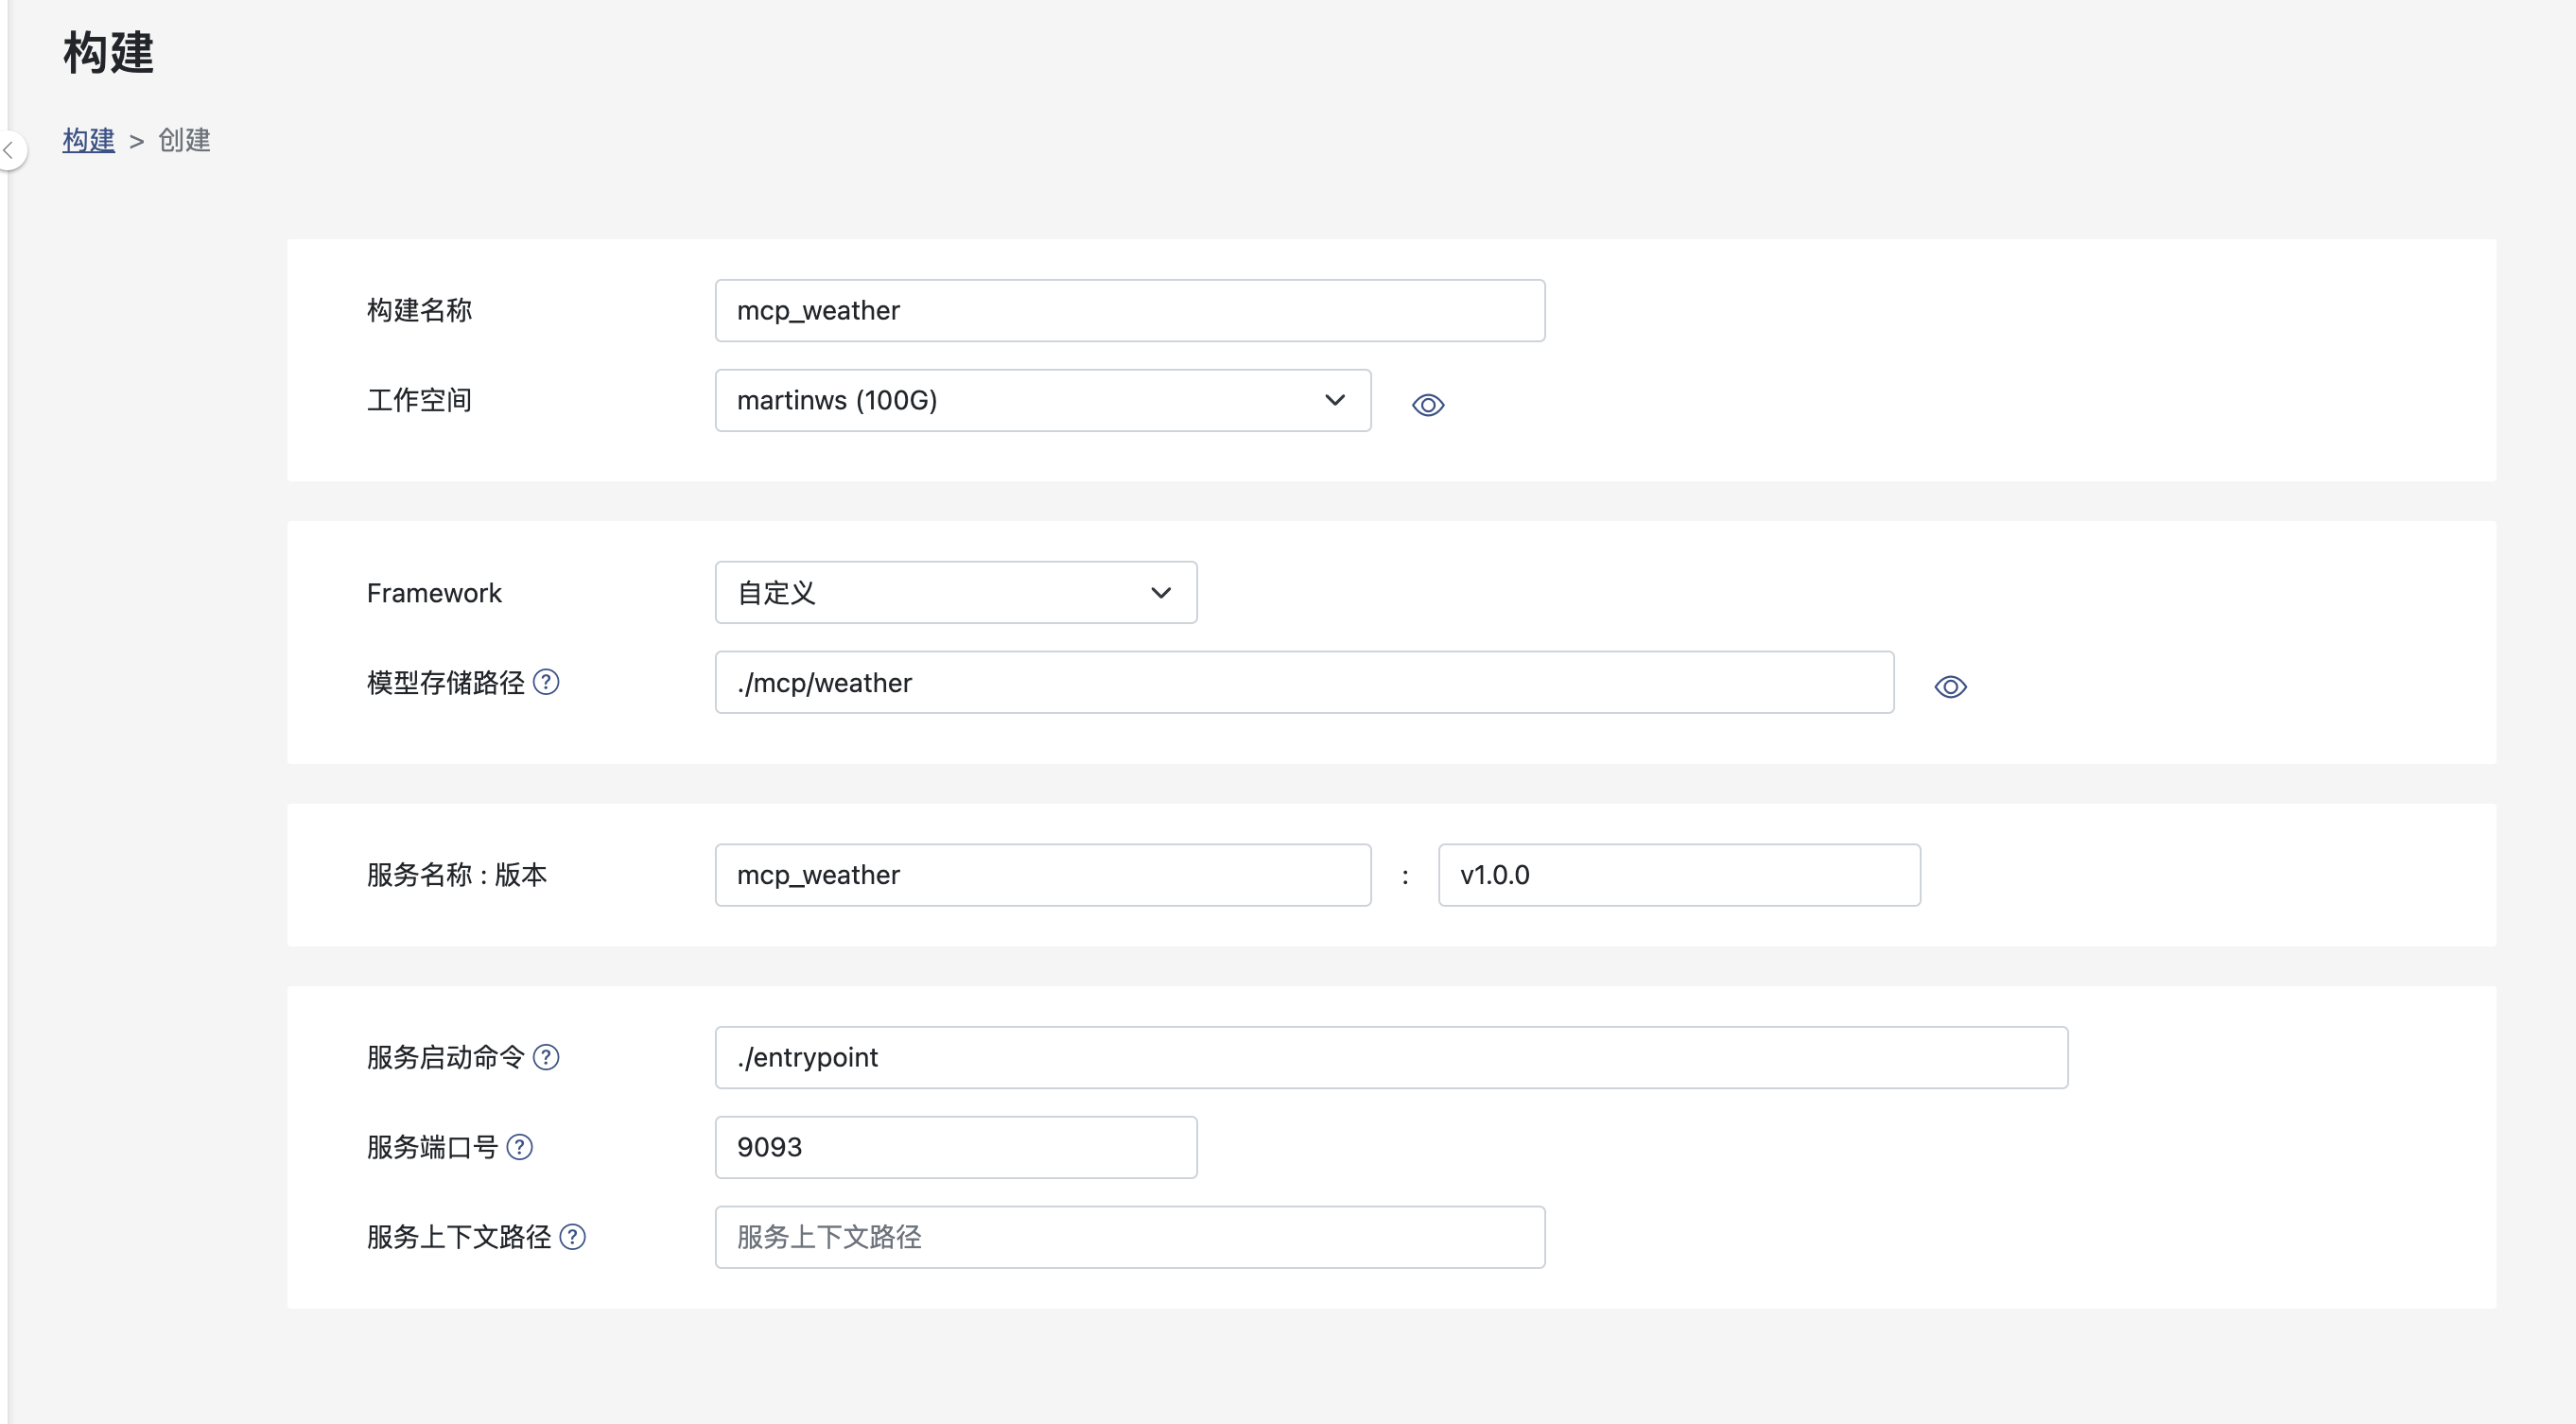
打包部署一个MCP Server服务
演示中,使用FastMCP框架开发一个MCP Server(例如:查询城市天气),此处仅是一个演示,所以简单实现,并不能正式使用。
首先,启动一个Notebook,准备MCP Server程序以及镜像文件。
- weather_server.py, MCP工具接口定义
- requirements.txt,依赖包
- entrypoint.sh,镜像启动入口命令
- Dockerfile,镜像定义文件

from mcp.server.fastmcp import FastMCP

mcp = FastMCP("Weather")

@mcp.tool()
async def get_weather(location: str) -> str:
    """Get weather for location."""
    return f"It's always sunny in {location}"

if __name__ == "__main__":
    mcp.settings.port = 9093
    mcp.run(transport="streamable-http")
langchain-mcp-adapters==0.0.11
mcp==1.8.1
#!/bin/bash

python /app/weather_server.py
FROM python:3.10

WORKDIR /app

COPY . .

RUN pip install -i https://pypi.tuna.tsinghua.edu.cn/simple -r requirements.txt
RUN chmod +x entrypoint.sh

CMD ["./entrypoint.sh"]
接下来,打包构建。详细操作可参考:自定义构建方式
打包成功之后,部署MCP Server。详细操作可参考:部署
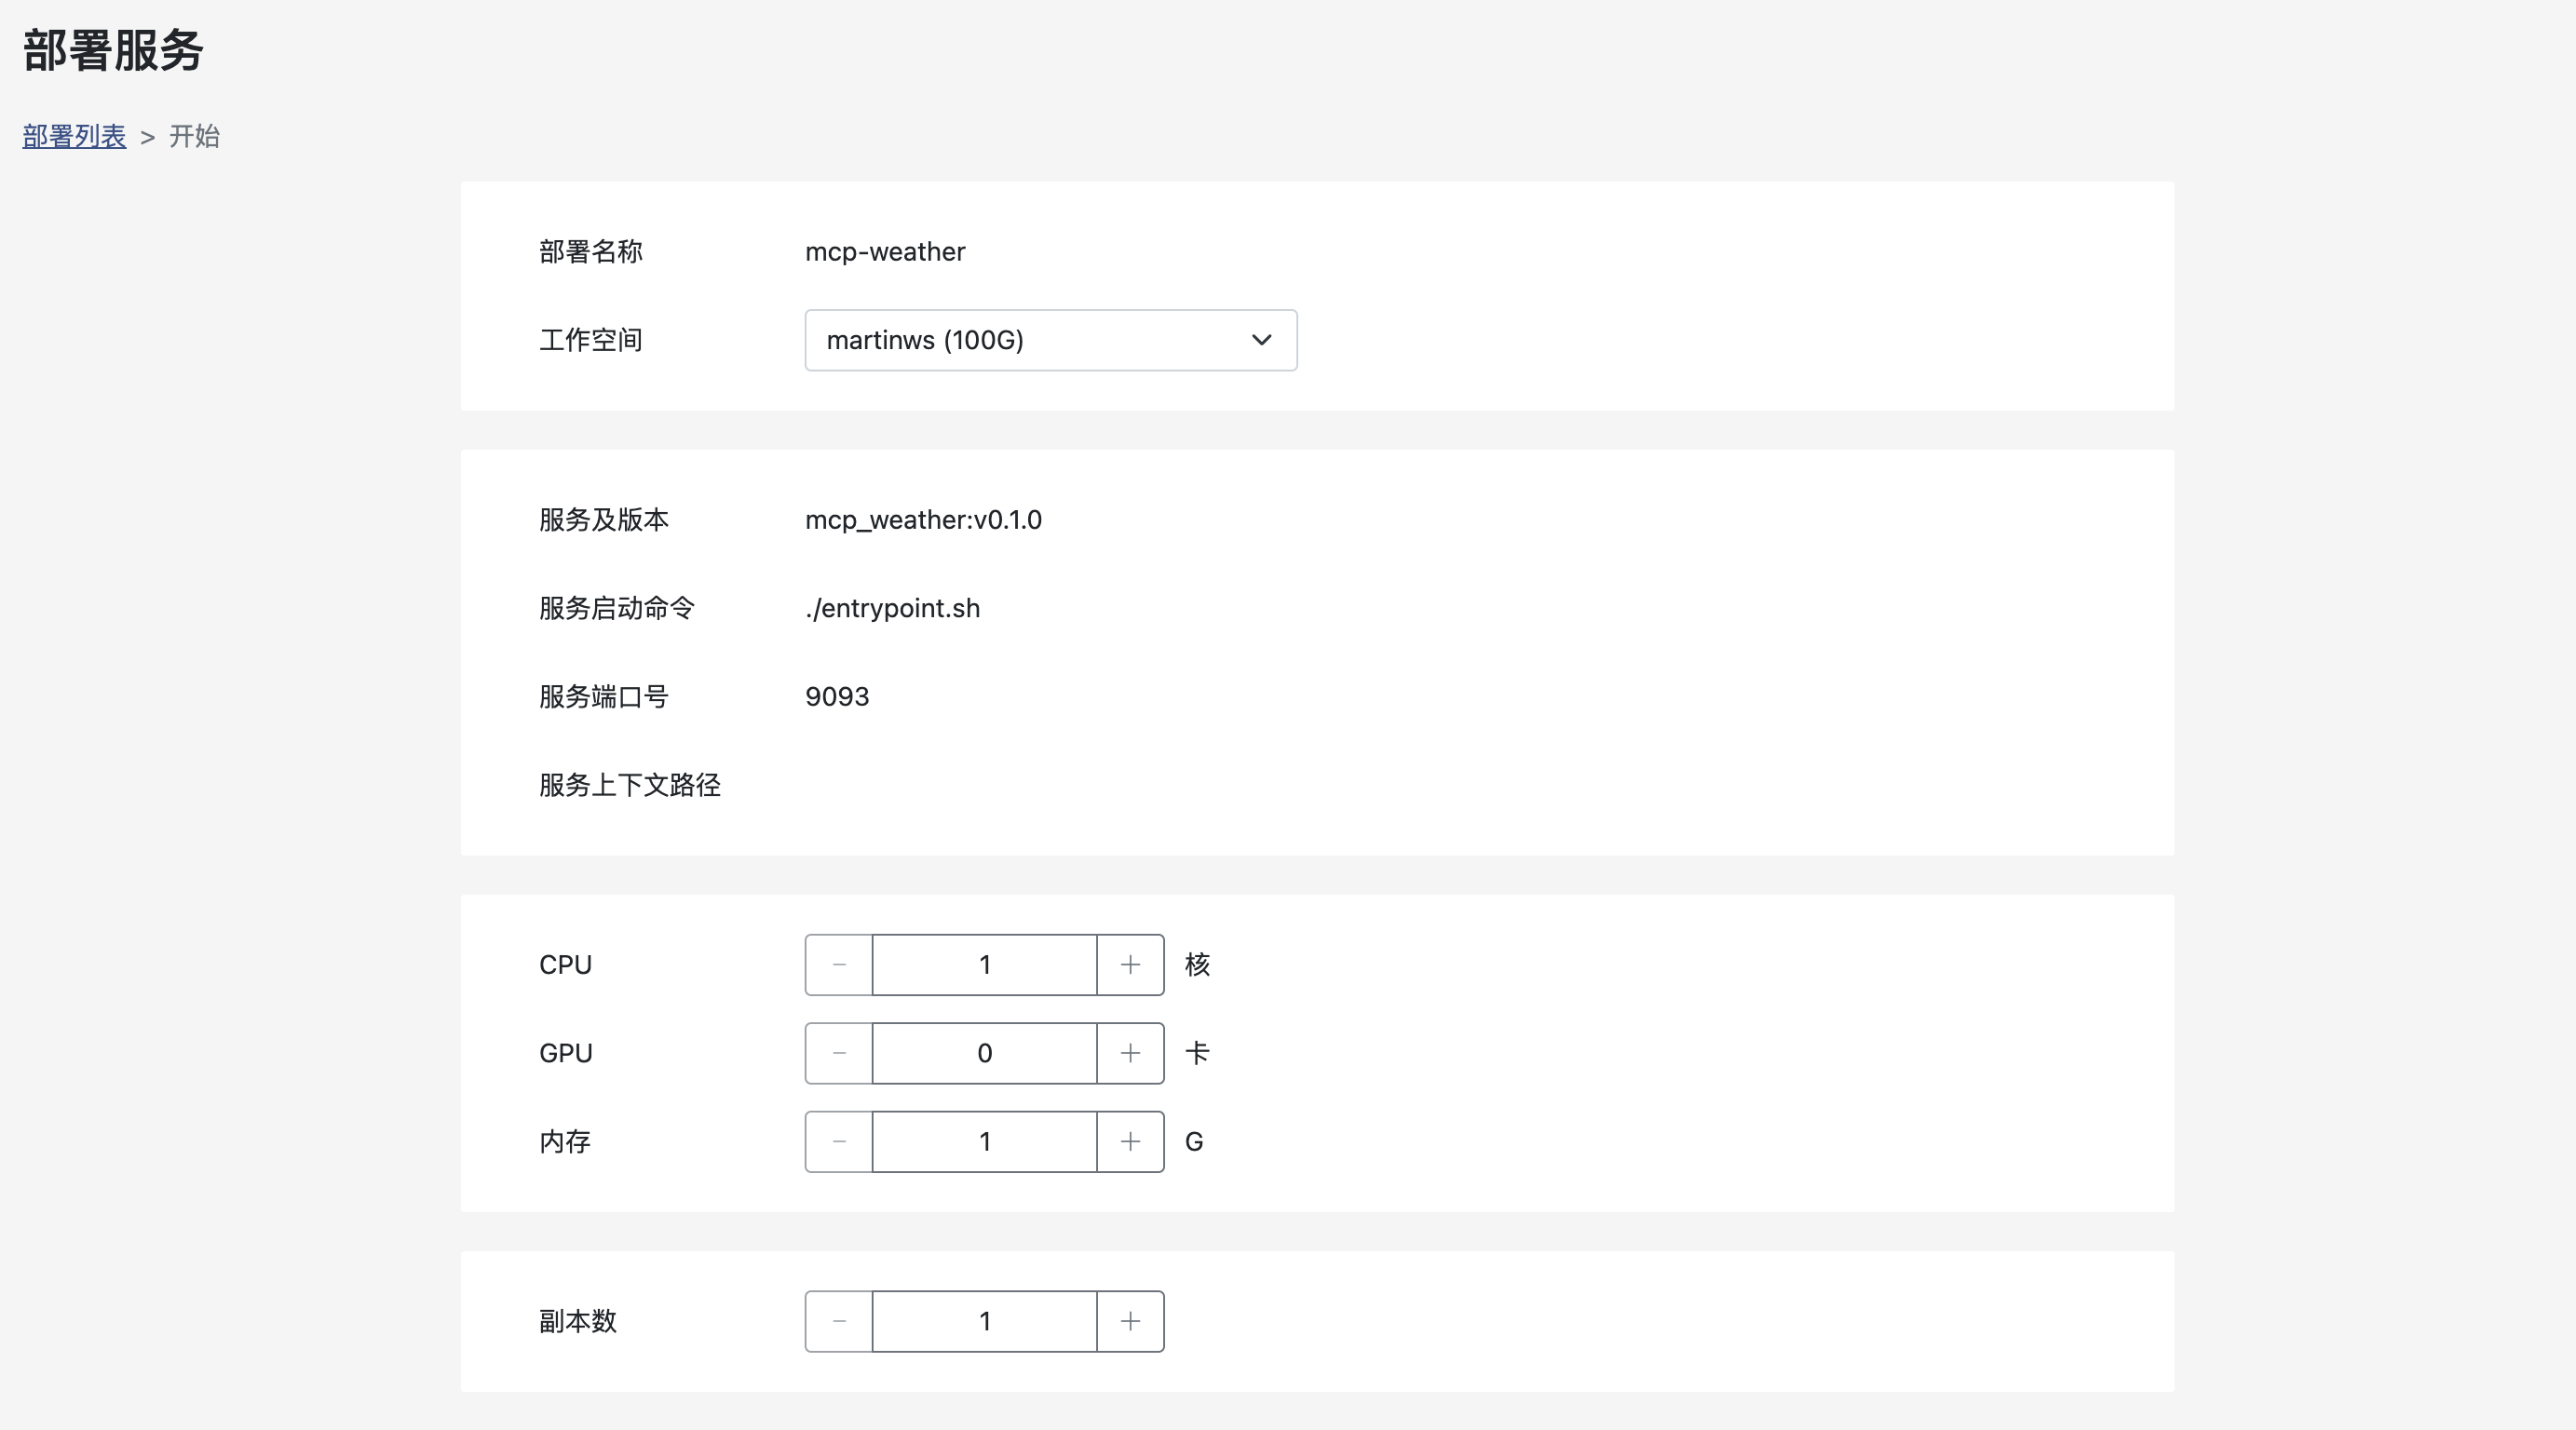
部署成功之后可以复制URL来创建一个http_streamable类型的MCP Server

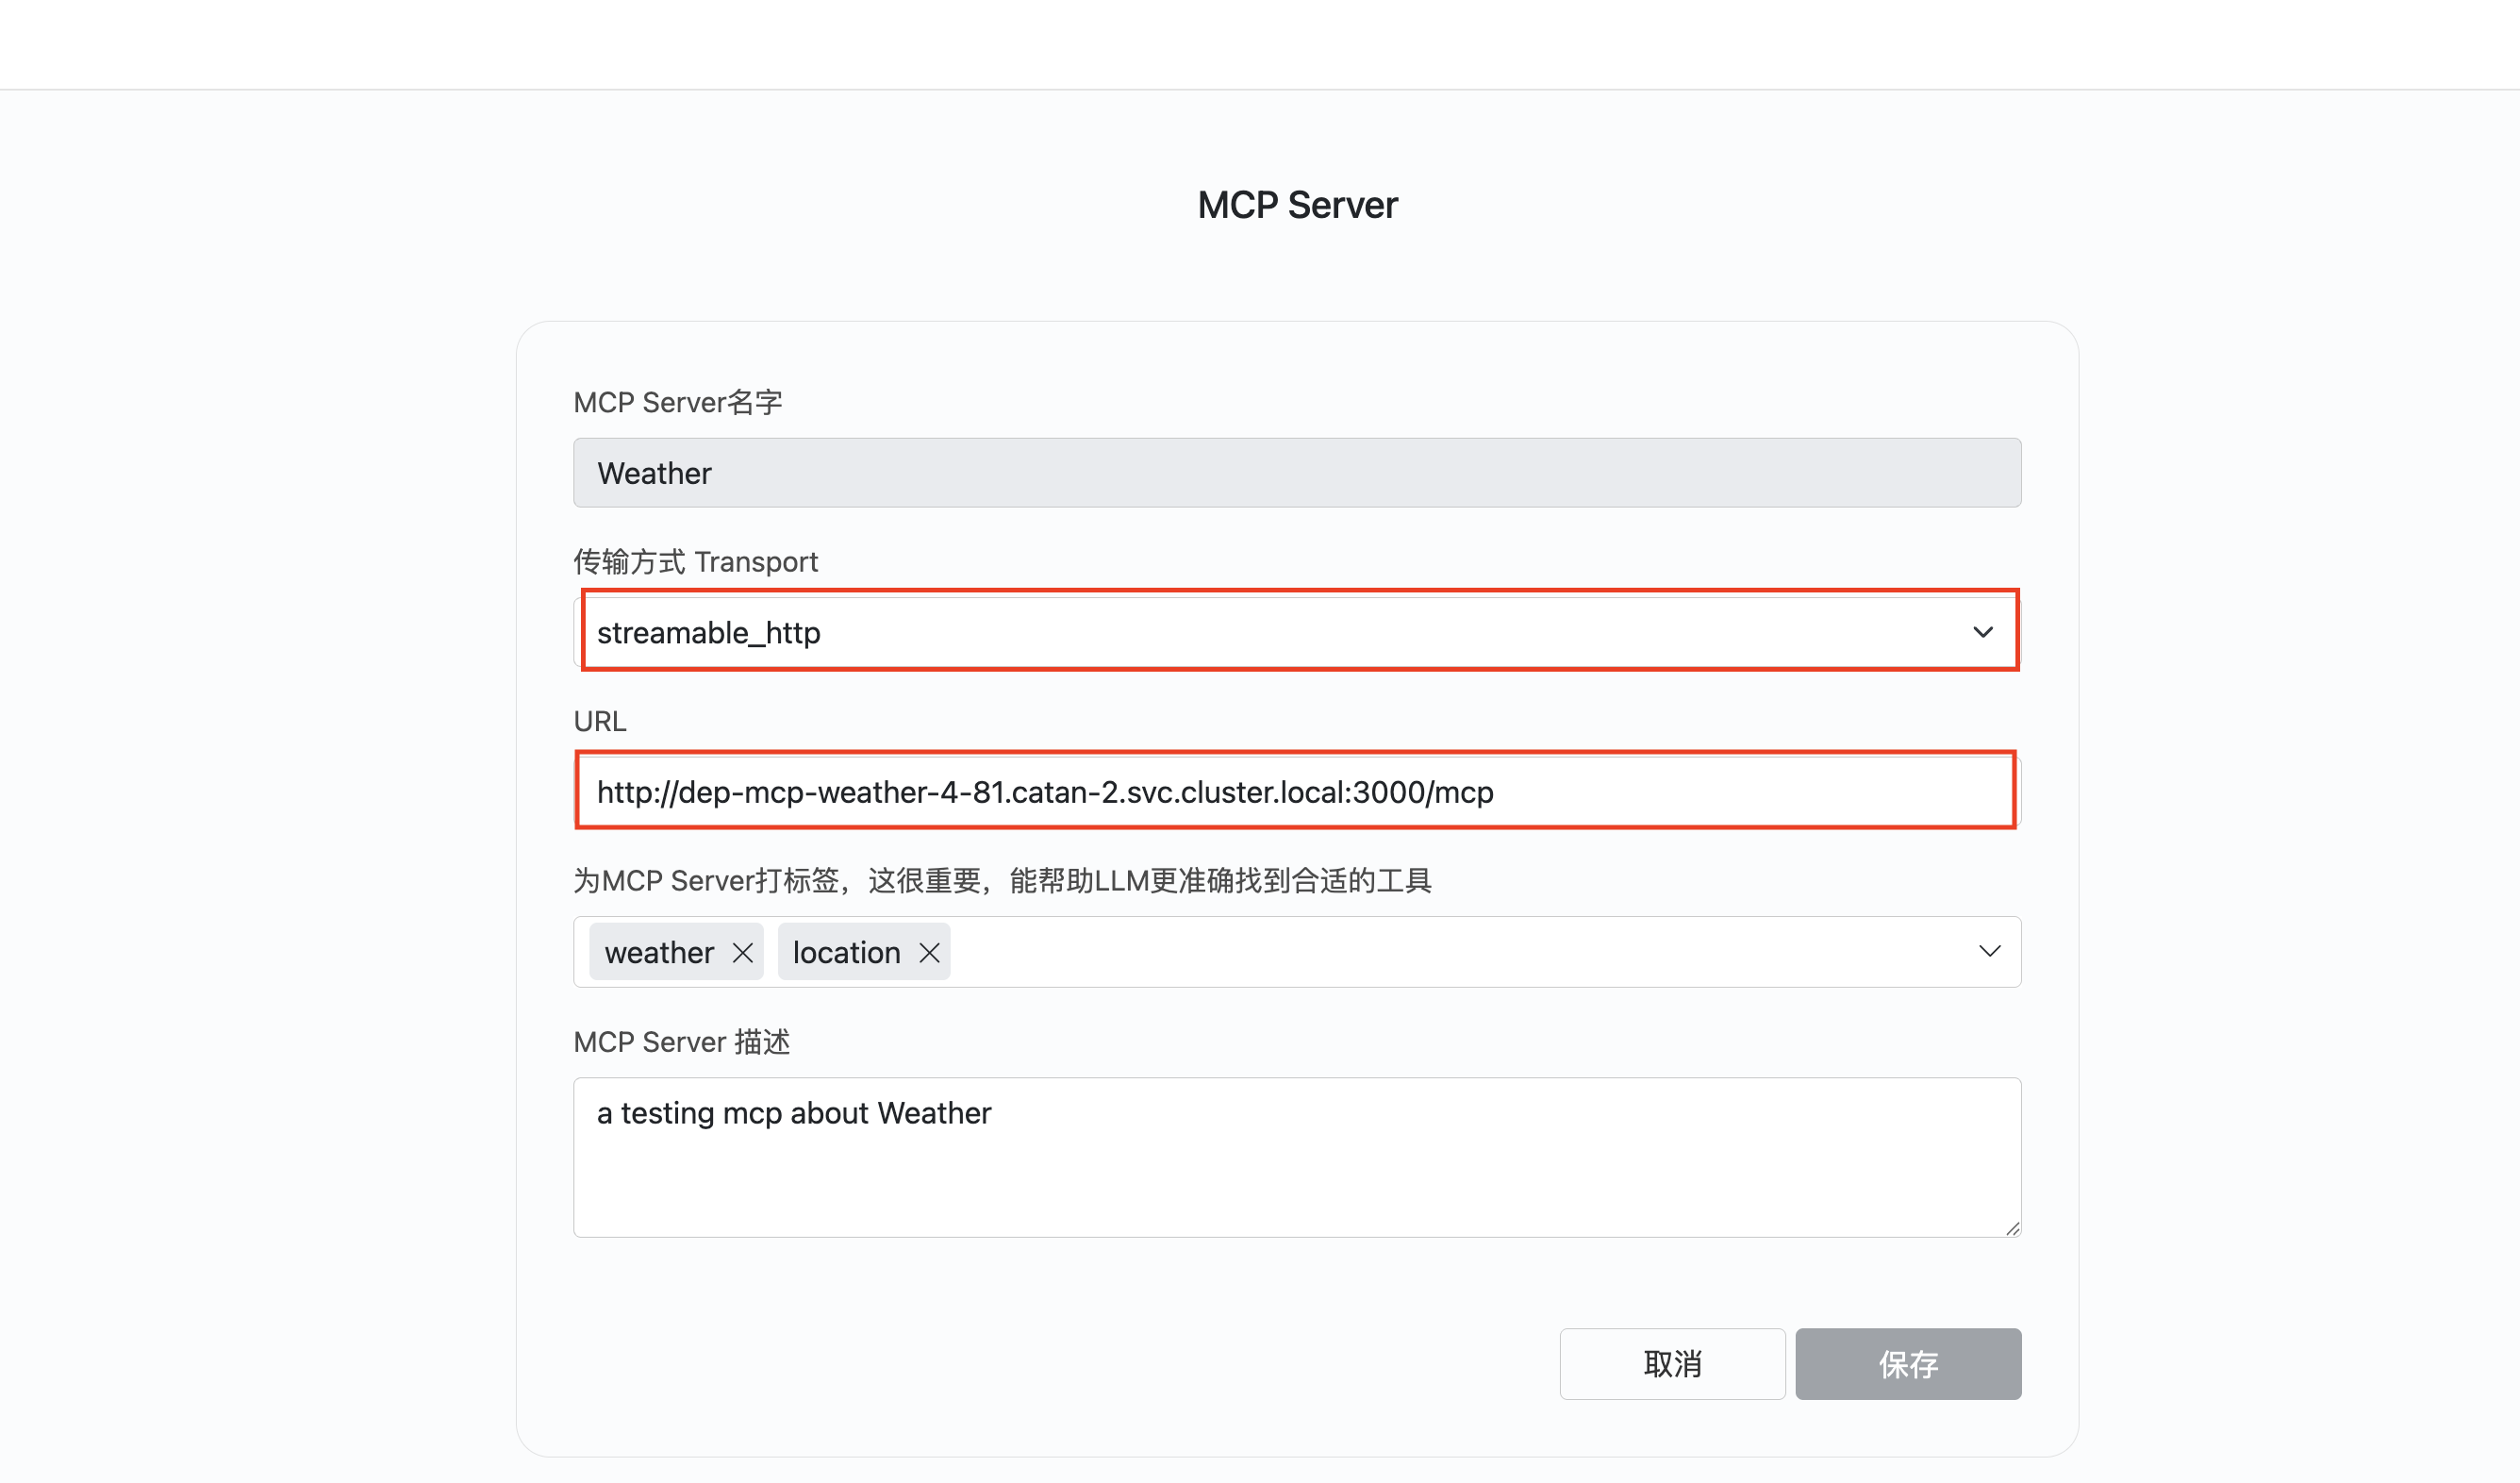
配置MCP
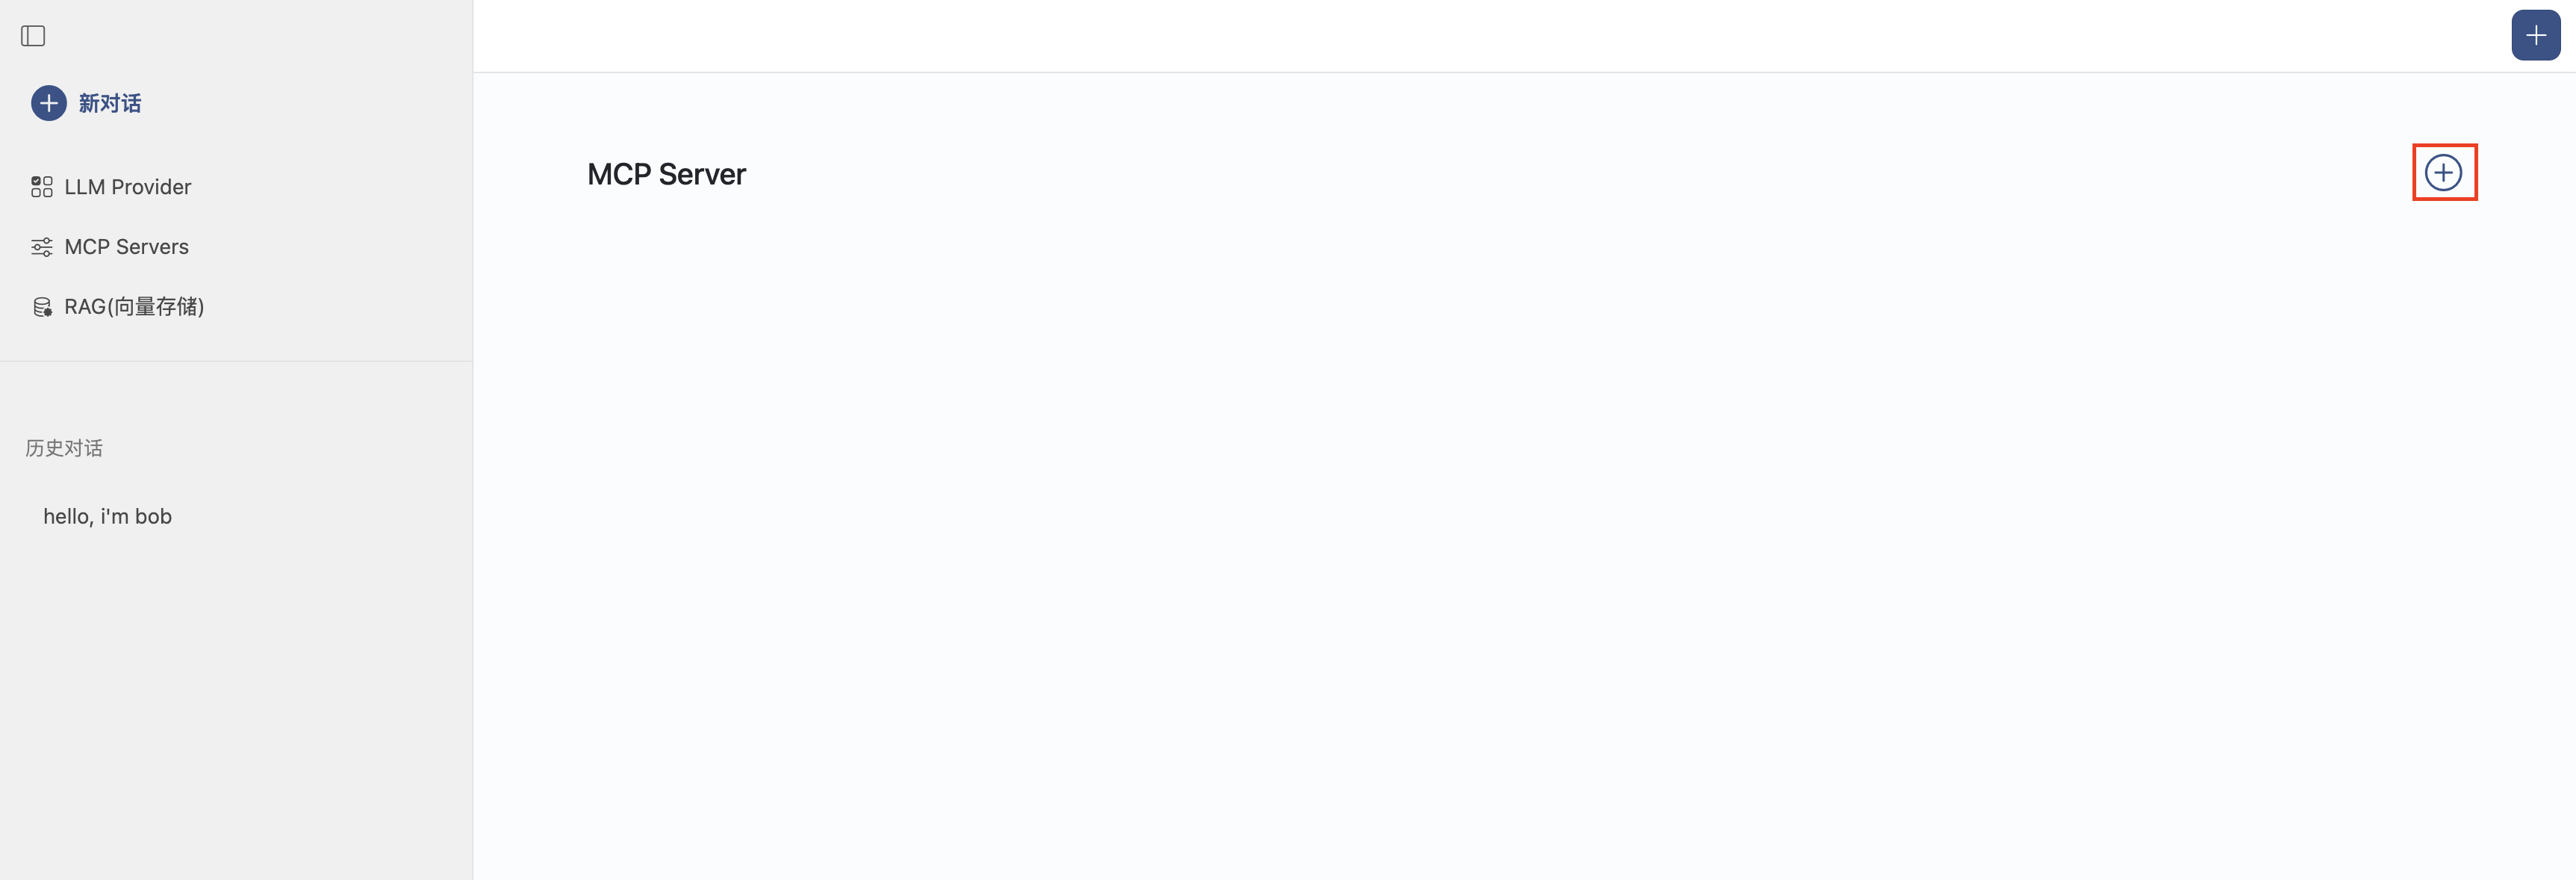
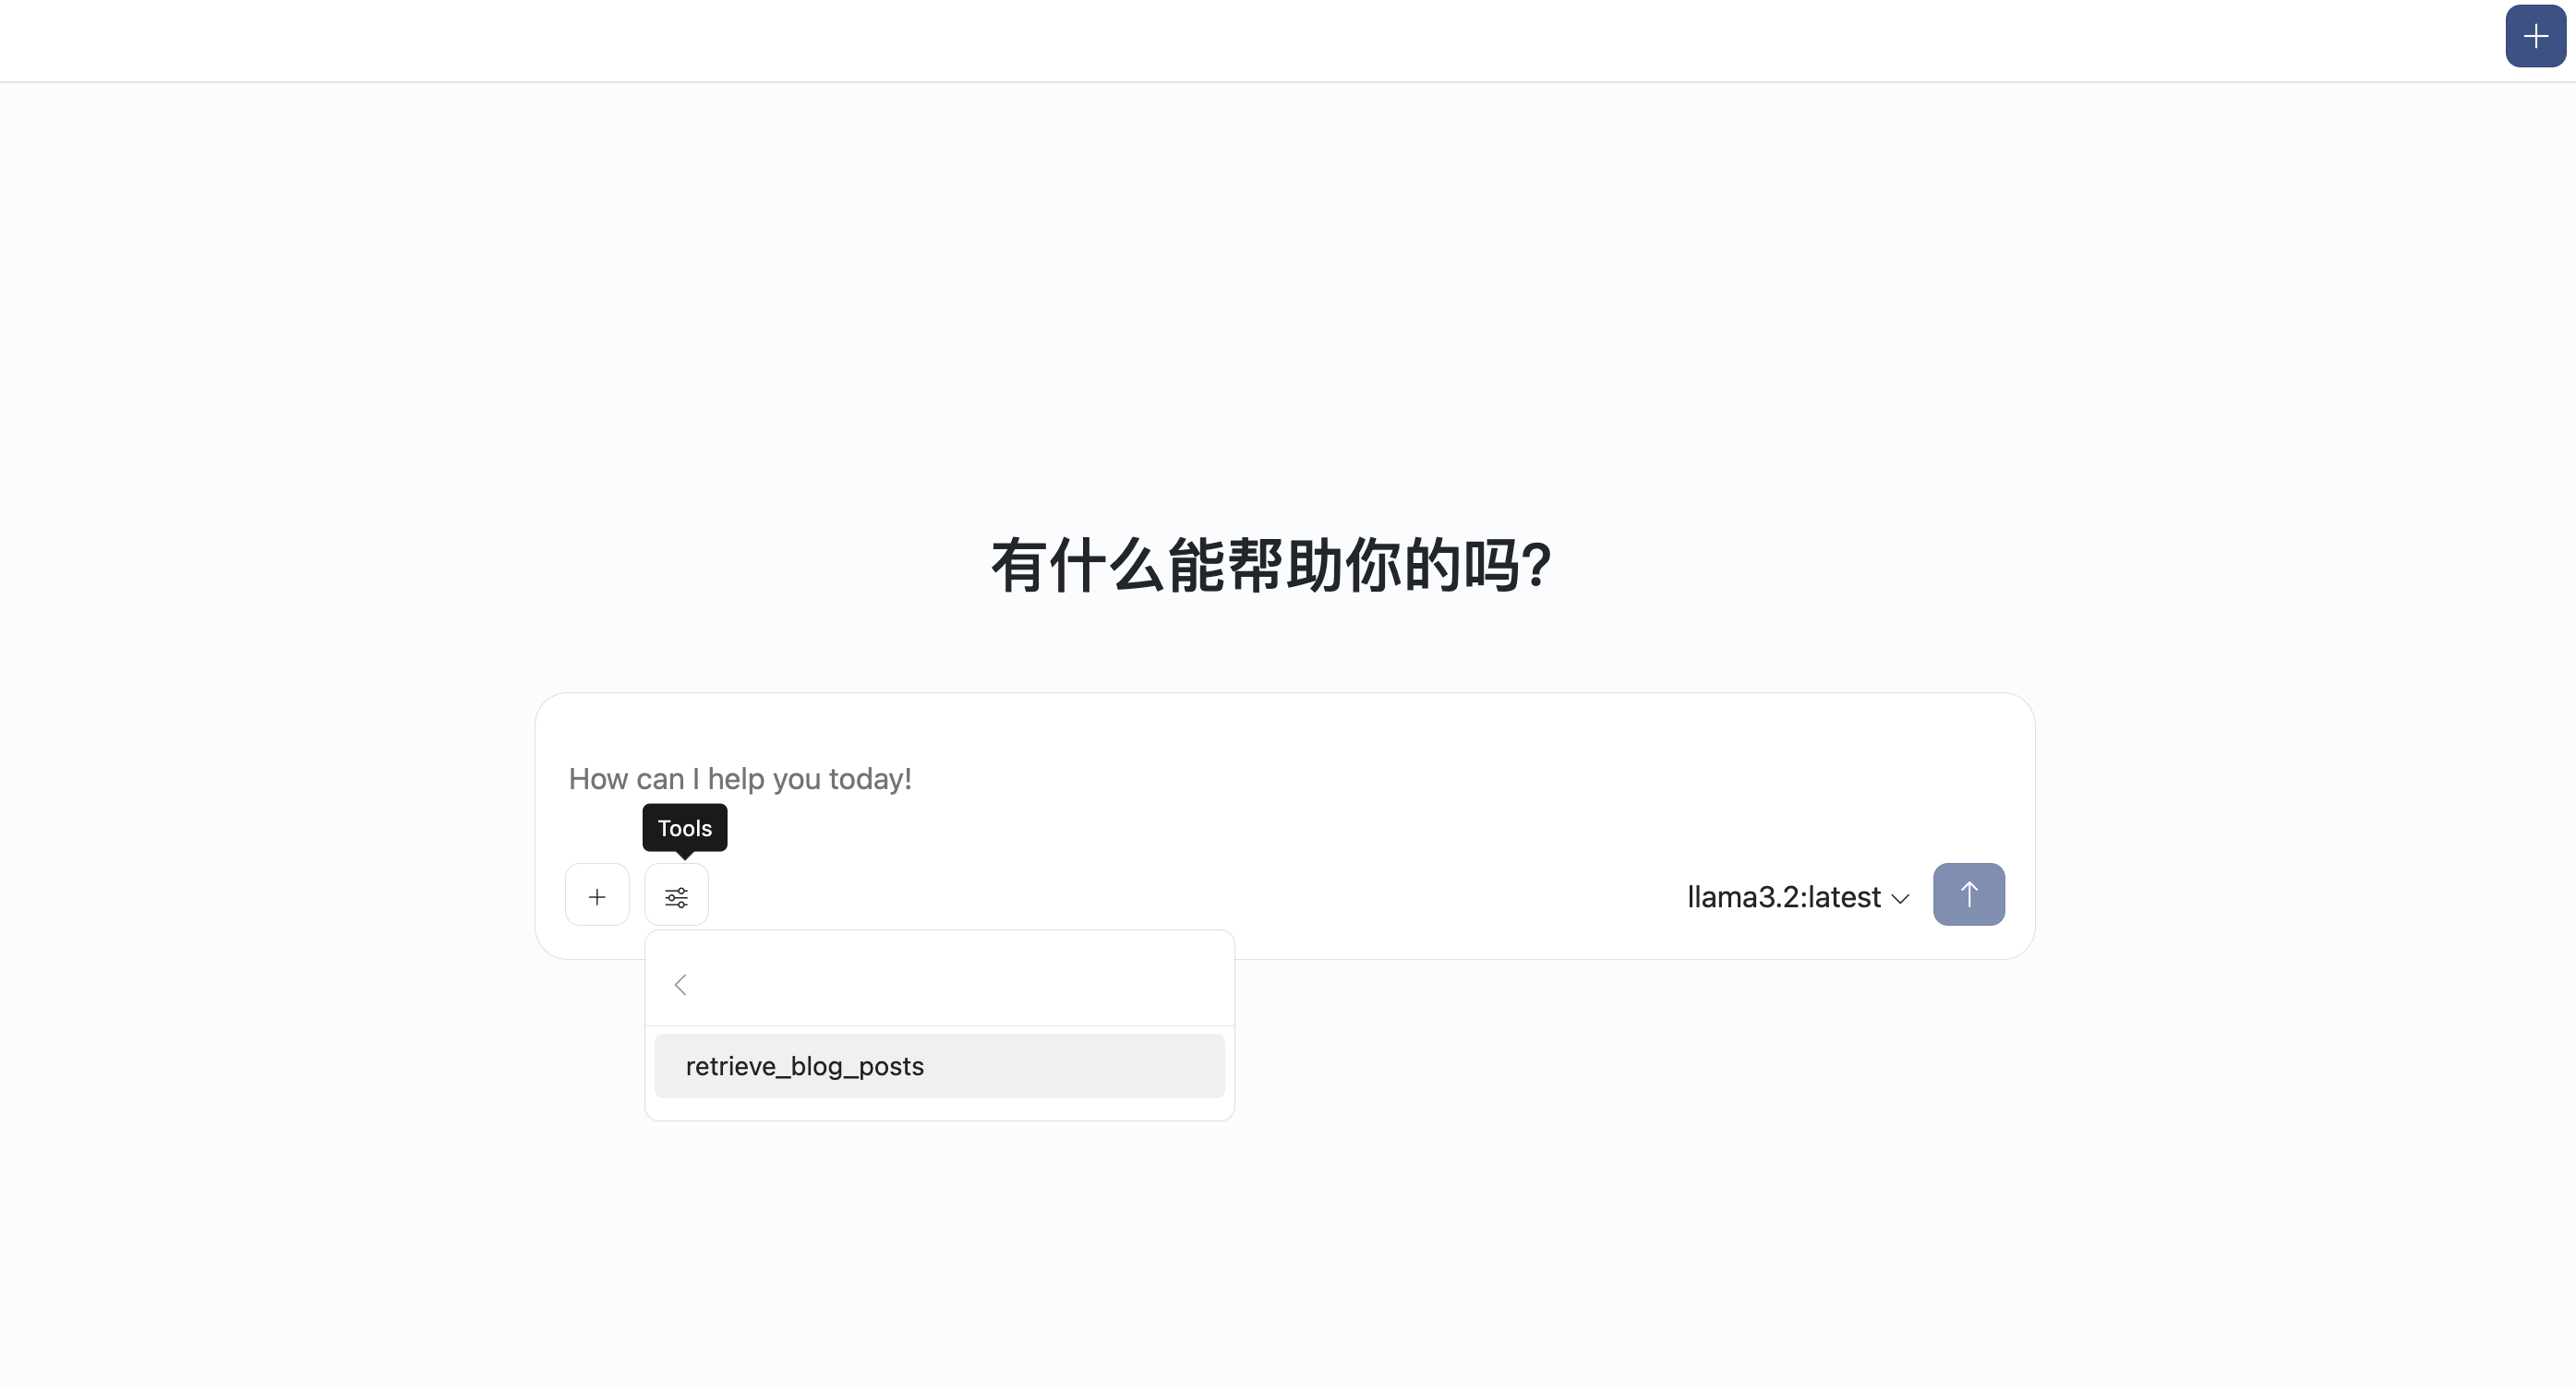
点击左侧MCP Servers菜单,点击+按钮添加一个MCP Server配置。
- 输入MCP Server名称,全局唯一,如果同名将被覆盖。
- 输入MCP Server运行命令及其参数,
uv run postgres-mcp --access-mode=unrestricted - 输入MCP Server运行的环境变量,演示中配置了Postgres的连接URI。
- 为MCP Server打标签。这一步很关键,能帮助模型准确快速找到问题相应的MCP工具。
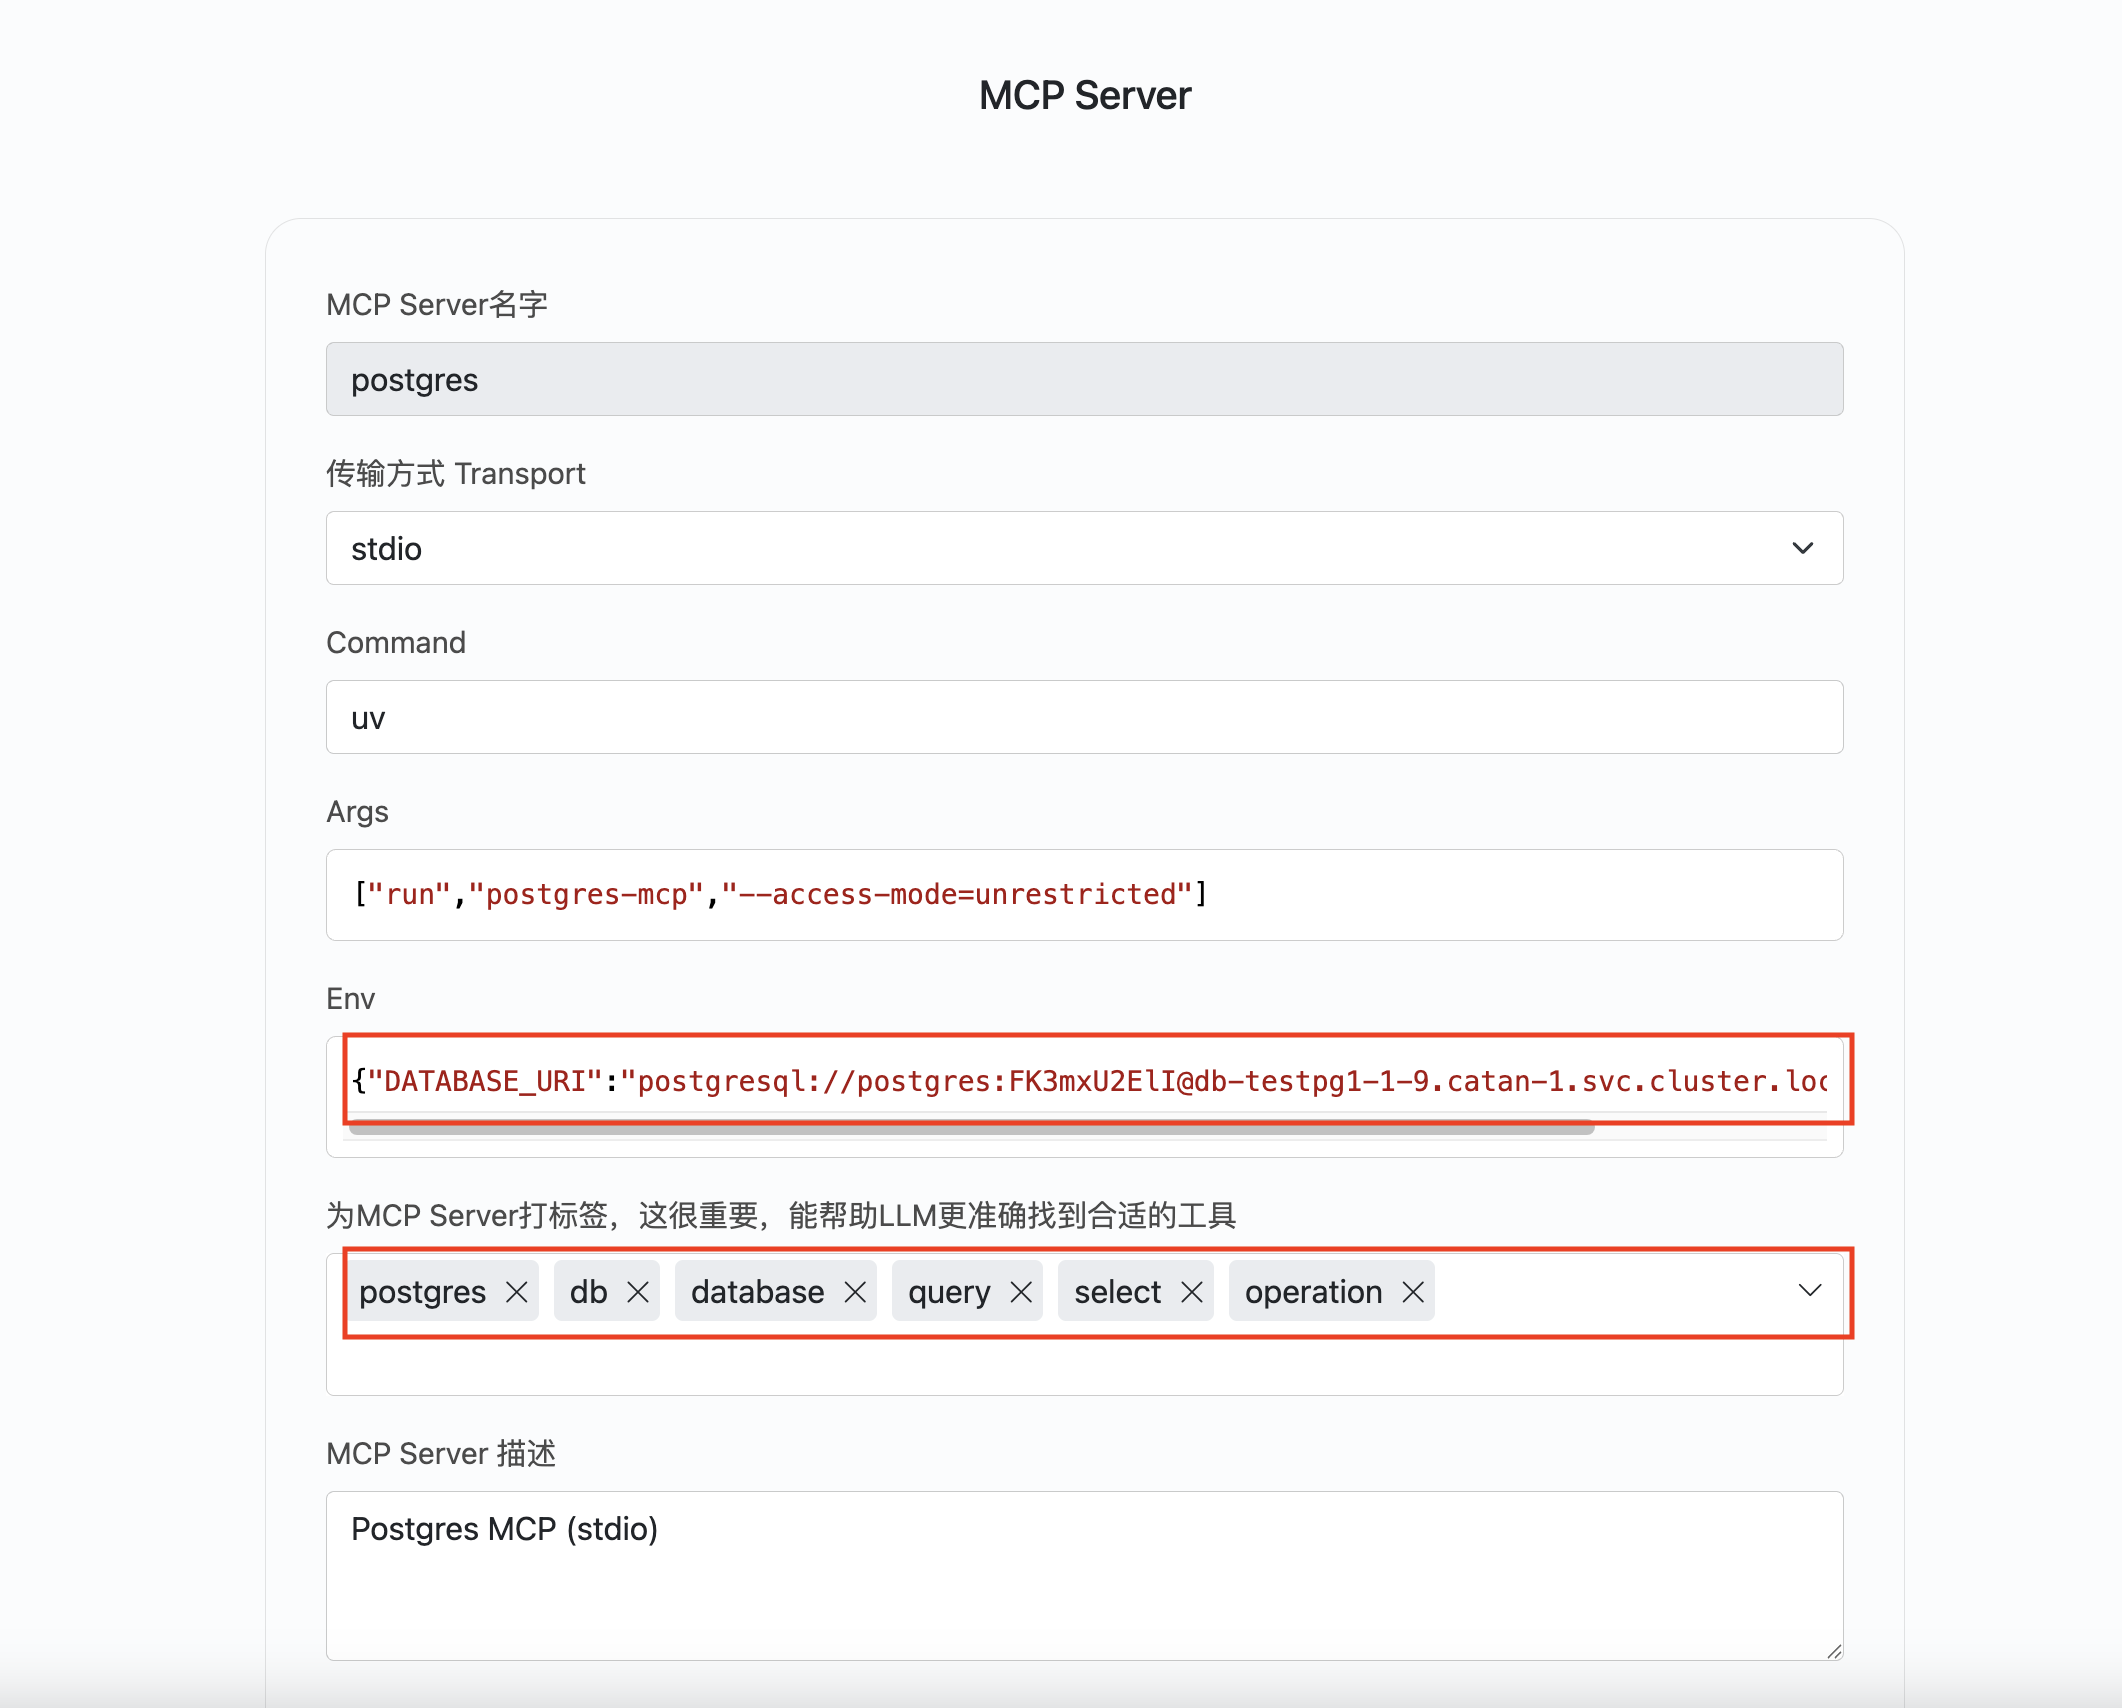
配置好后,可以在这里看到可以使用的MCP工具
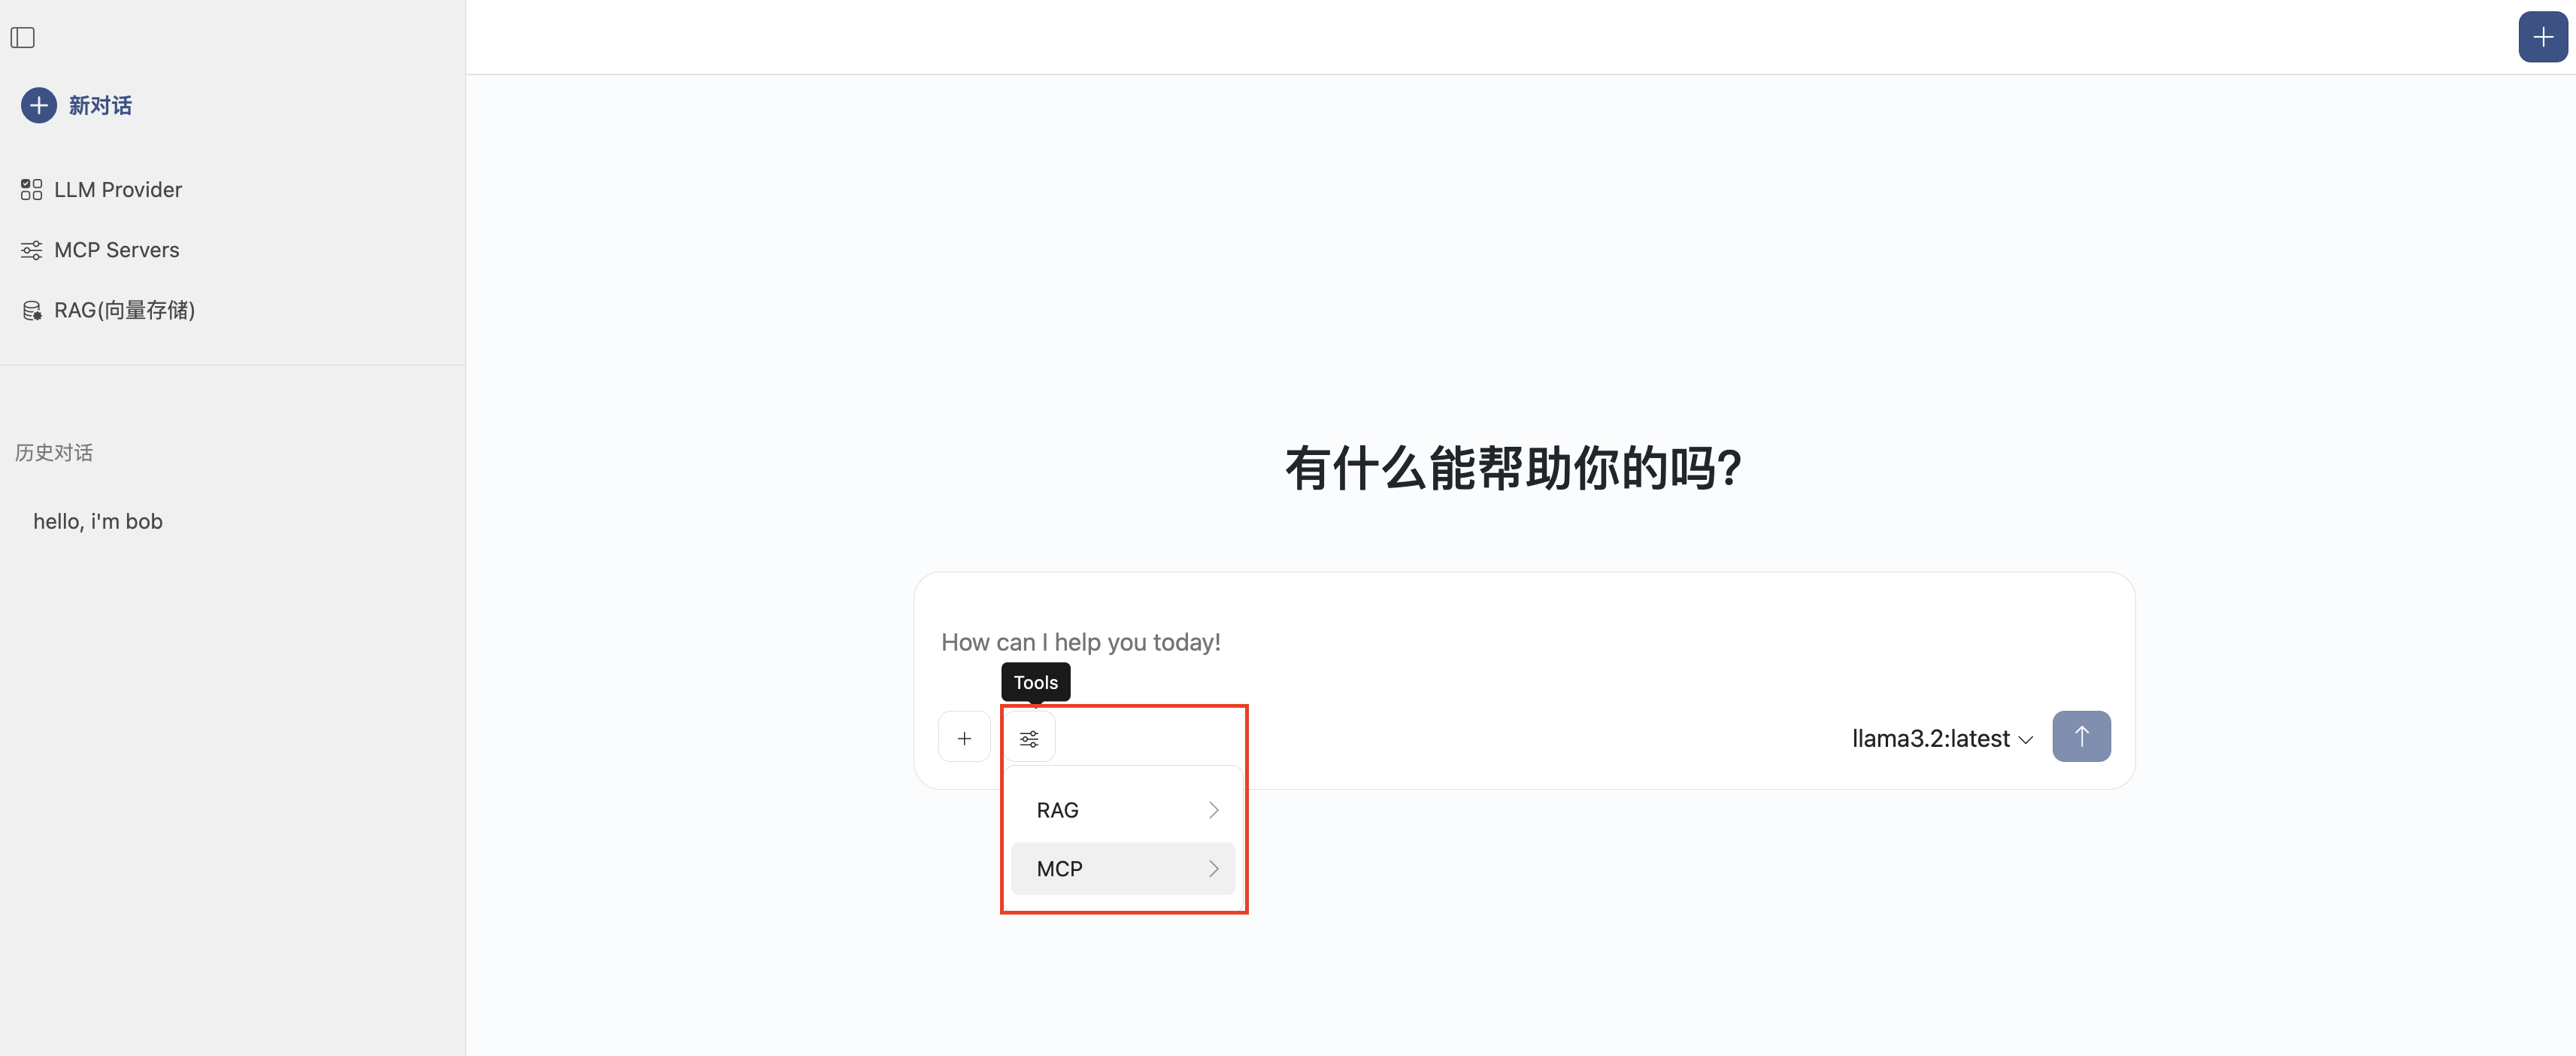
使用MCP
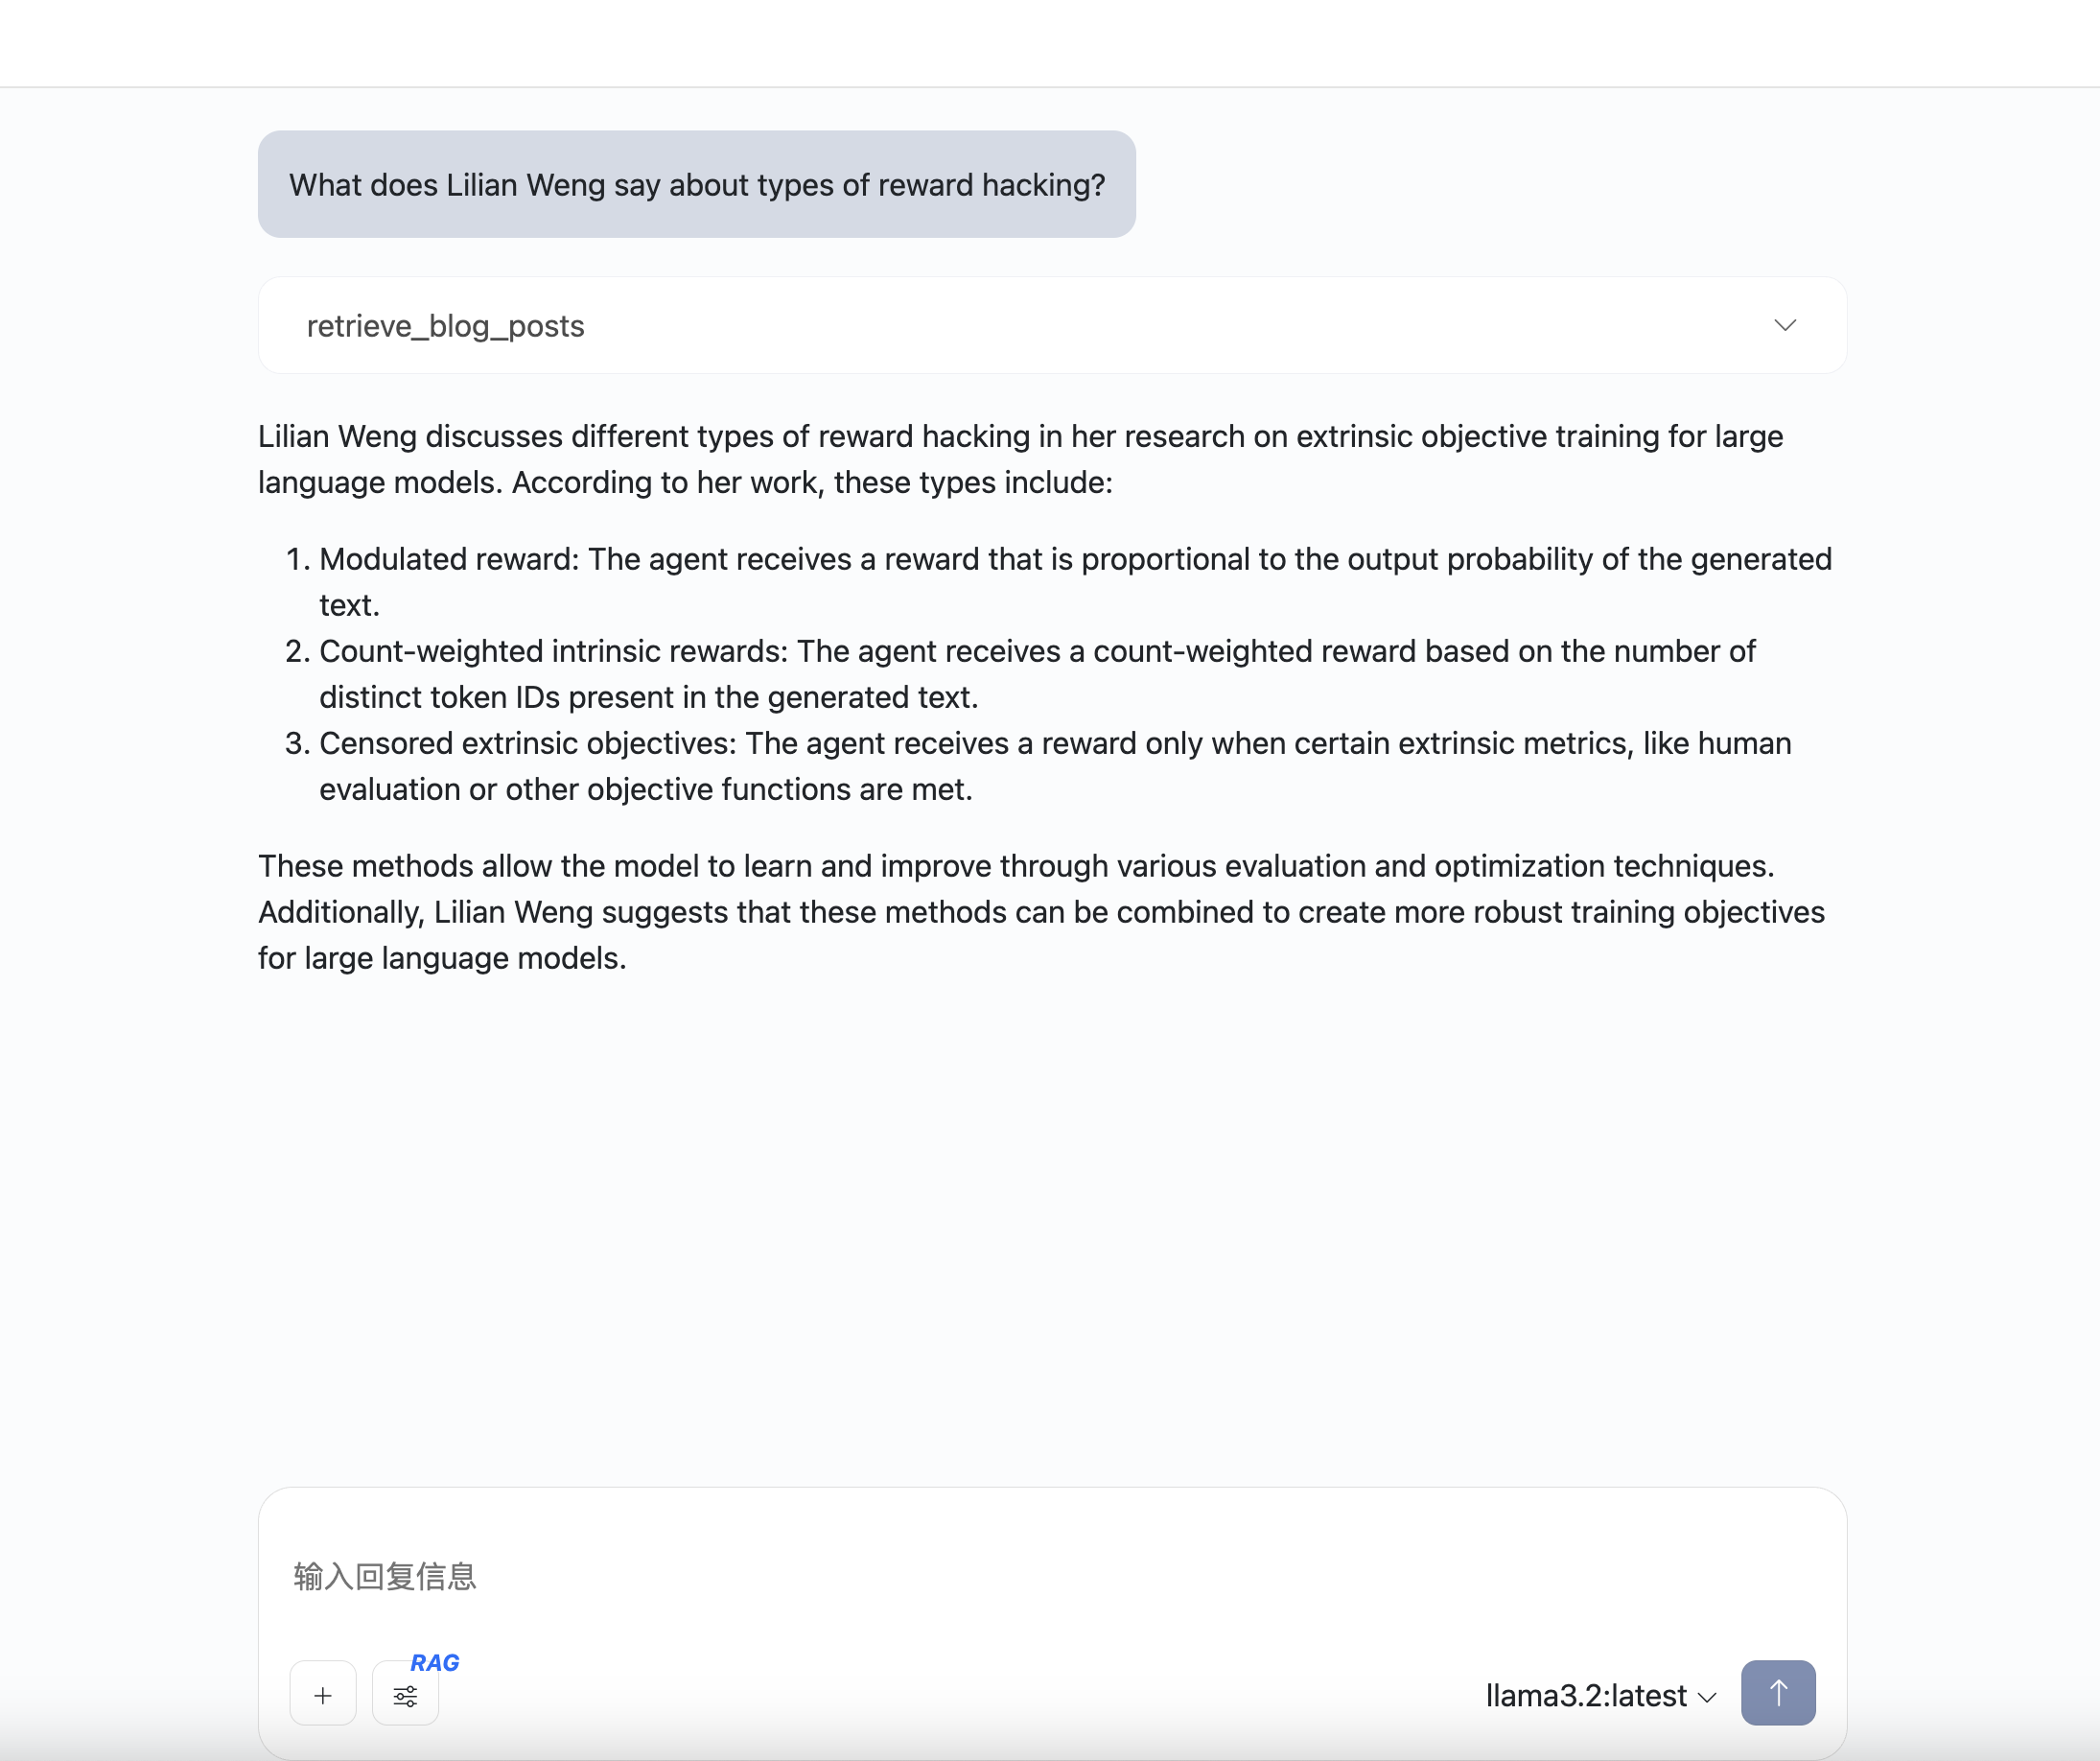
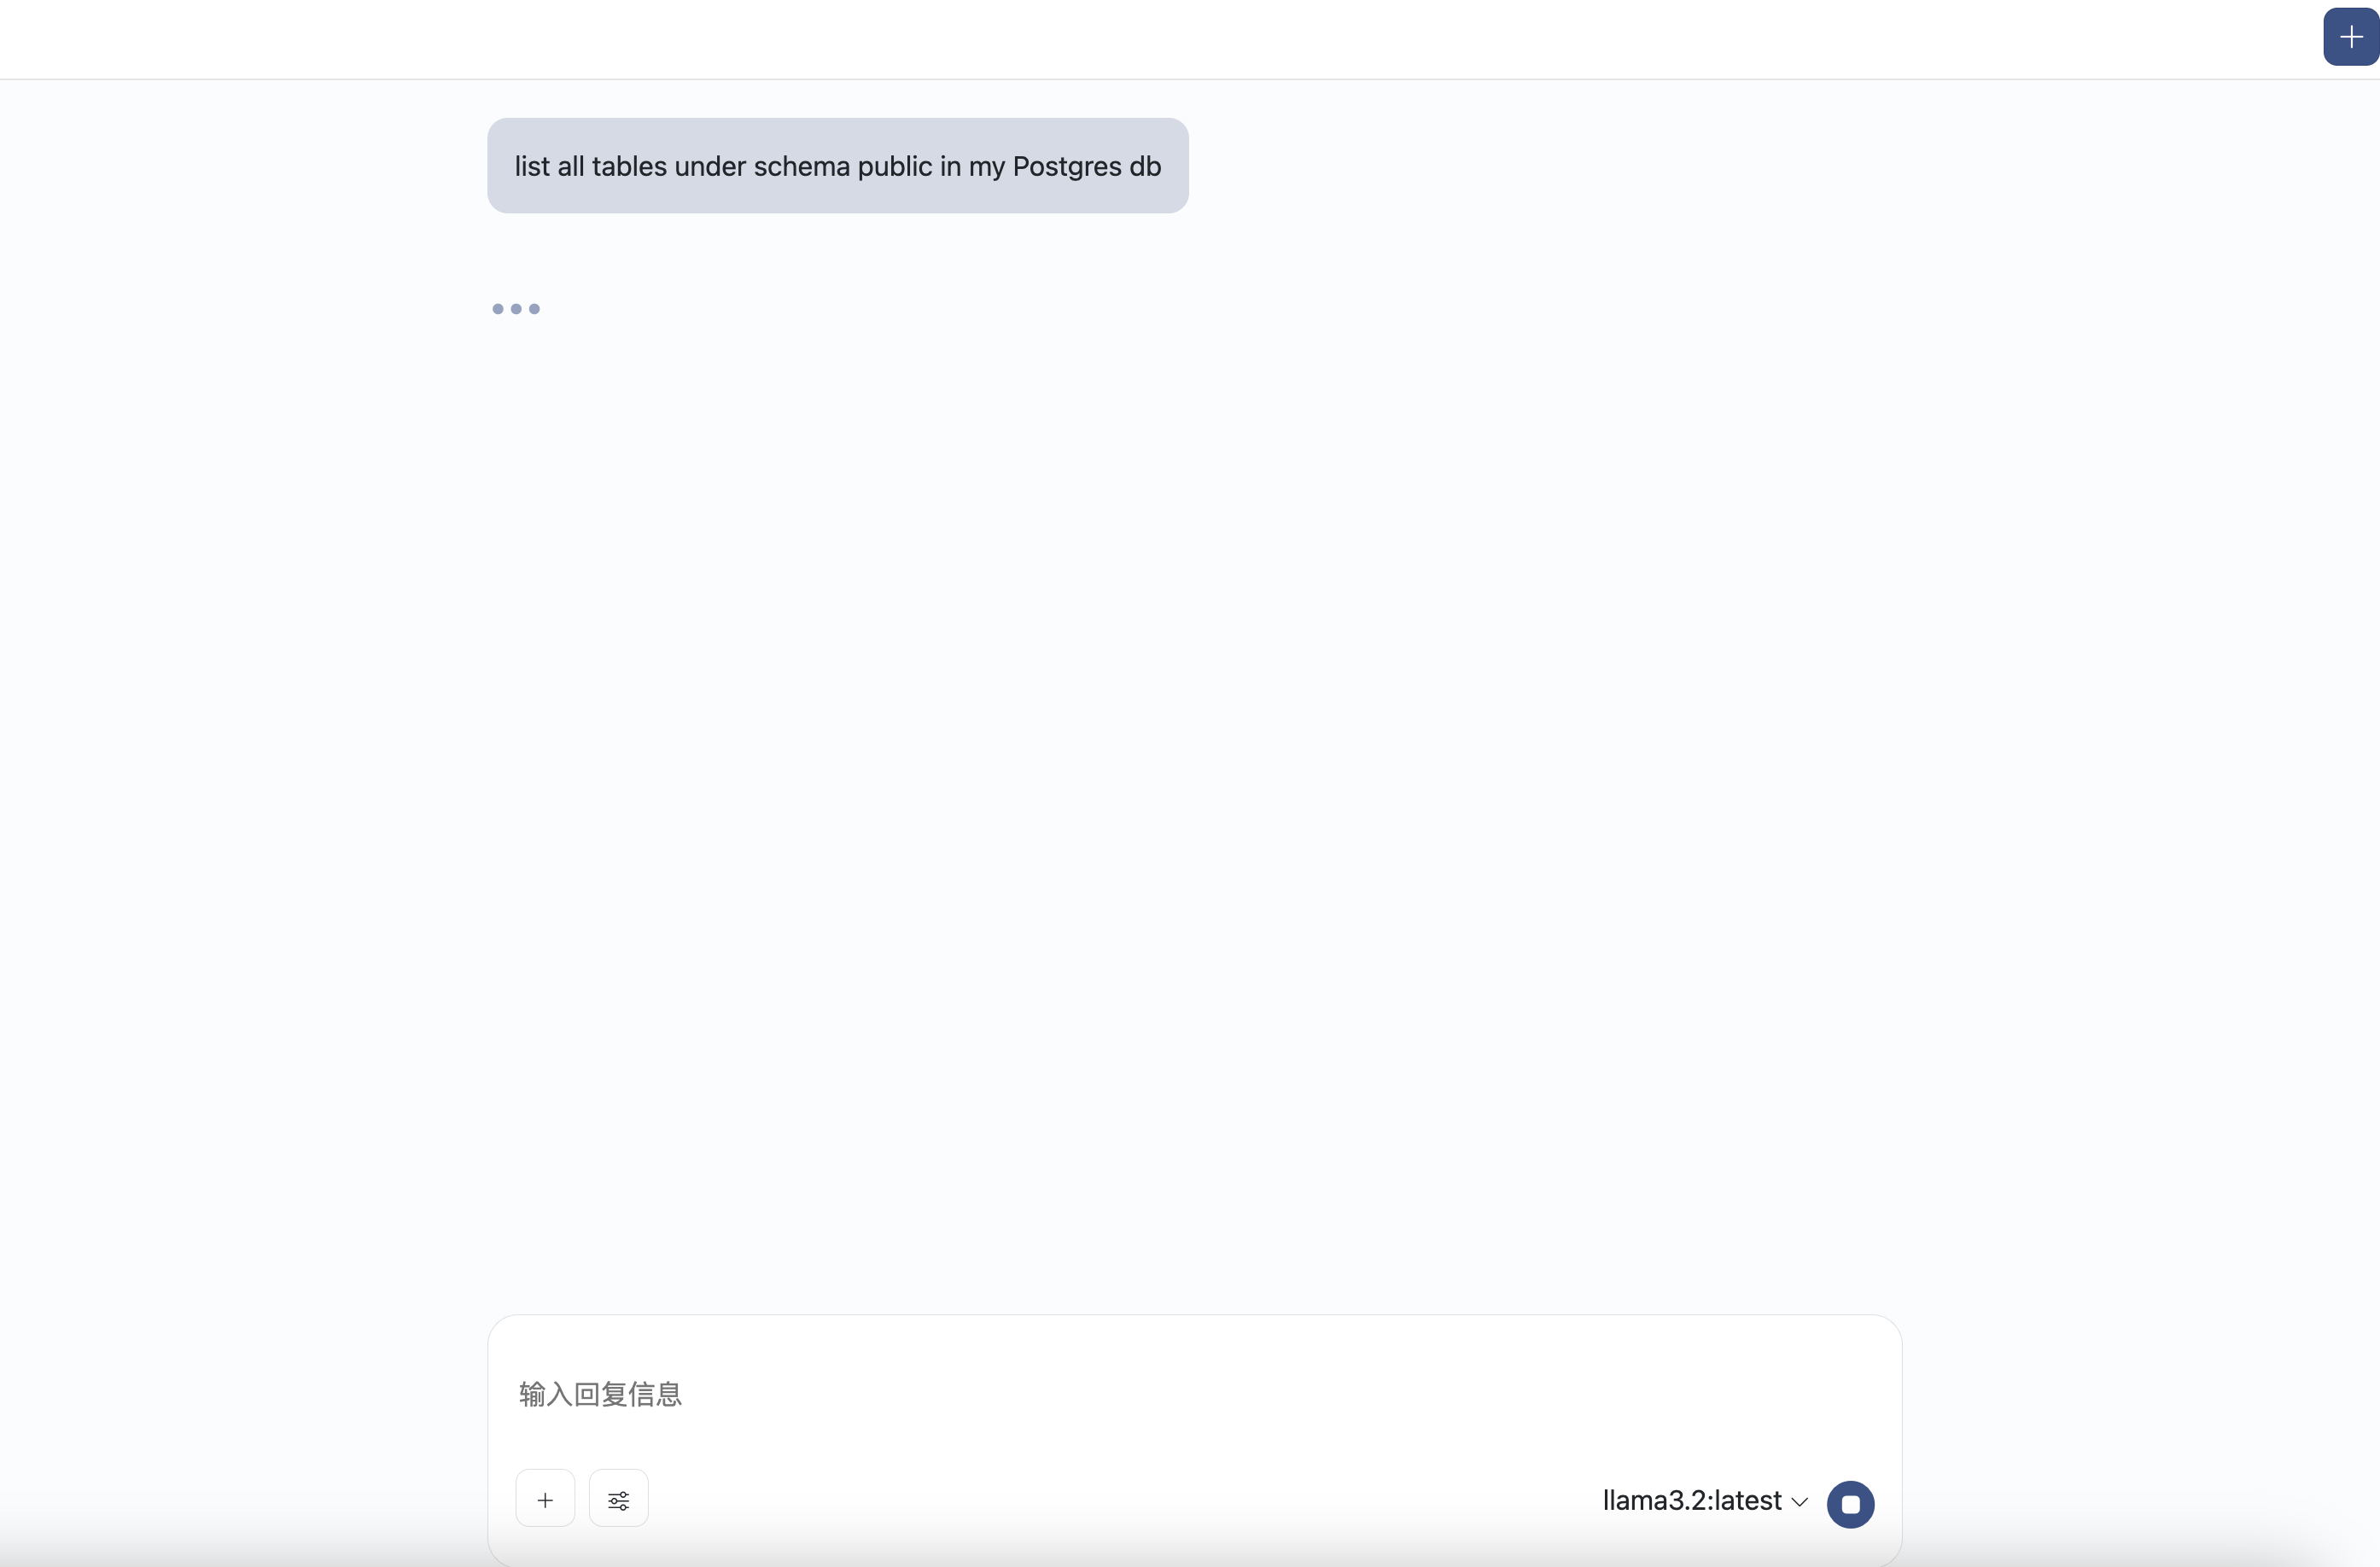
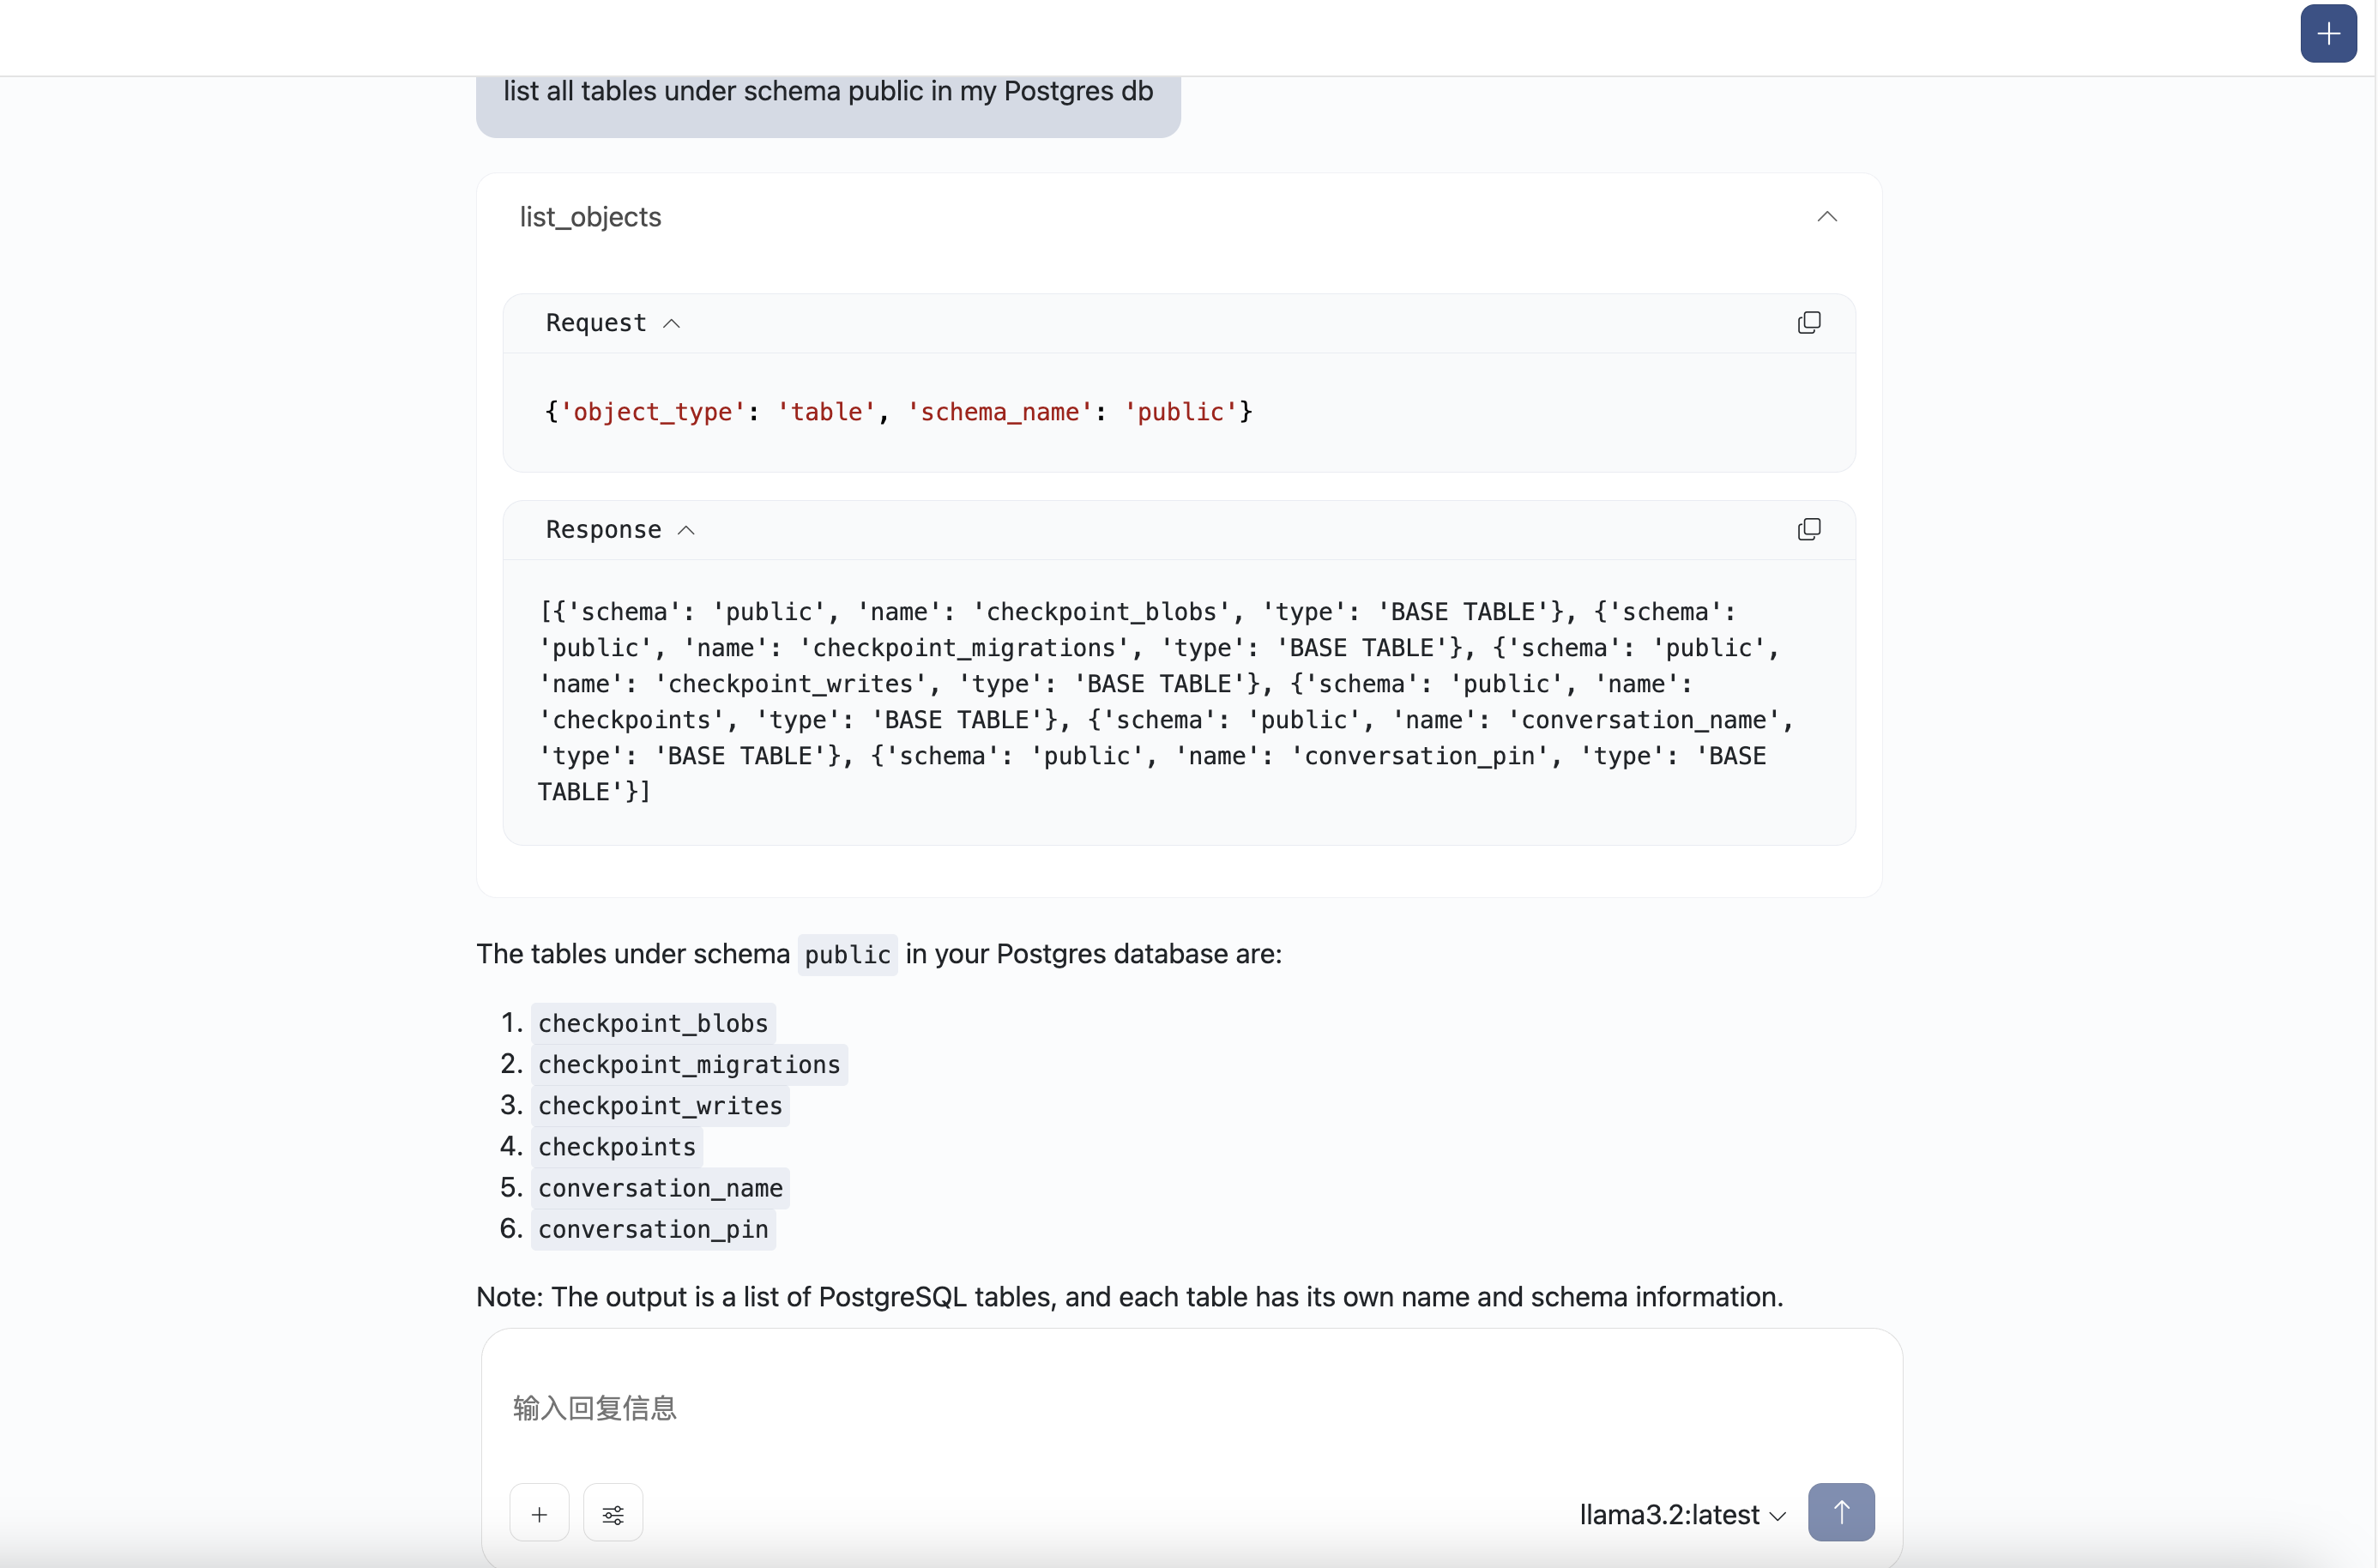
输入问题:list all tables under schema public in my Postgres db
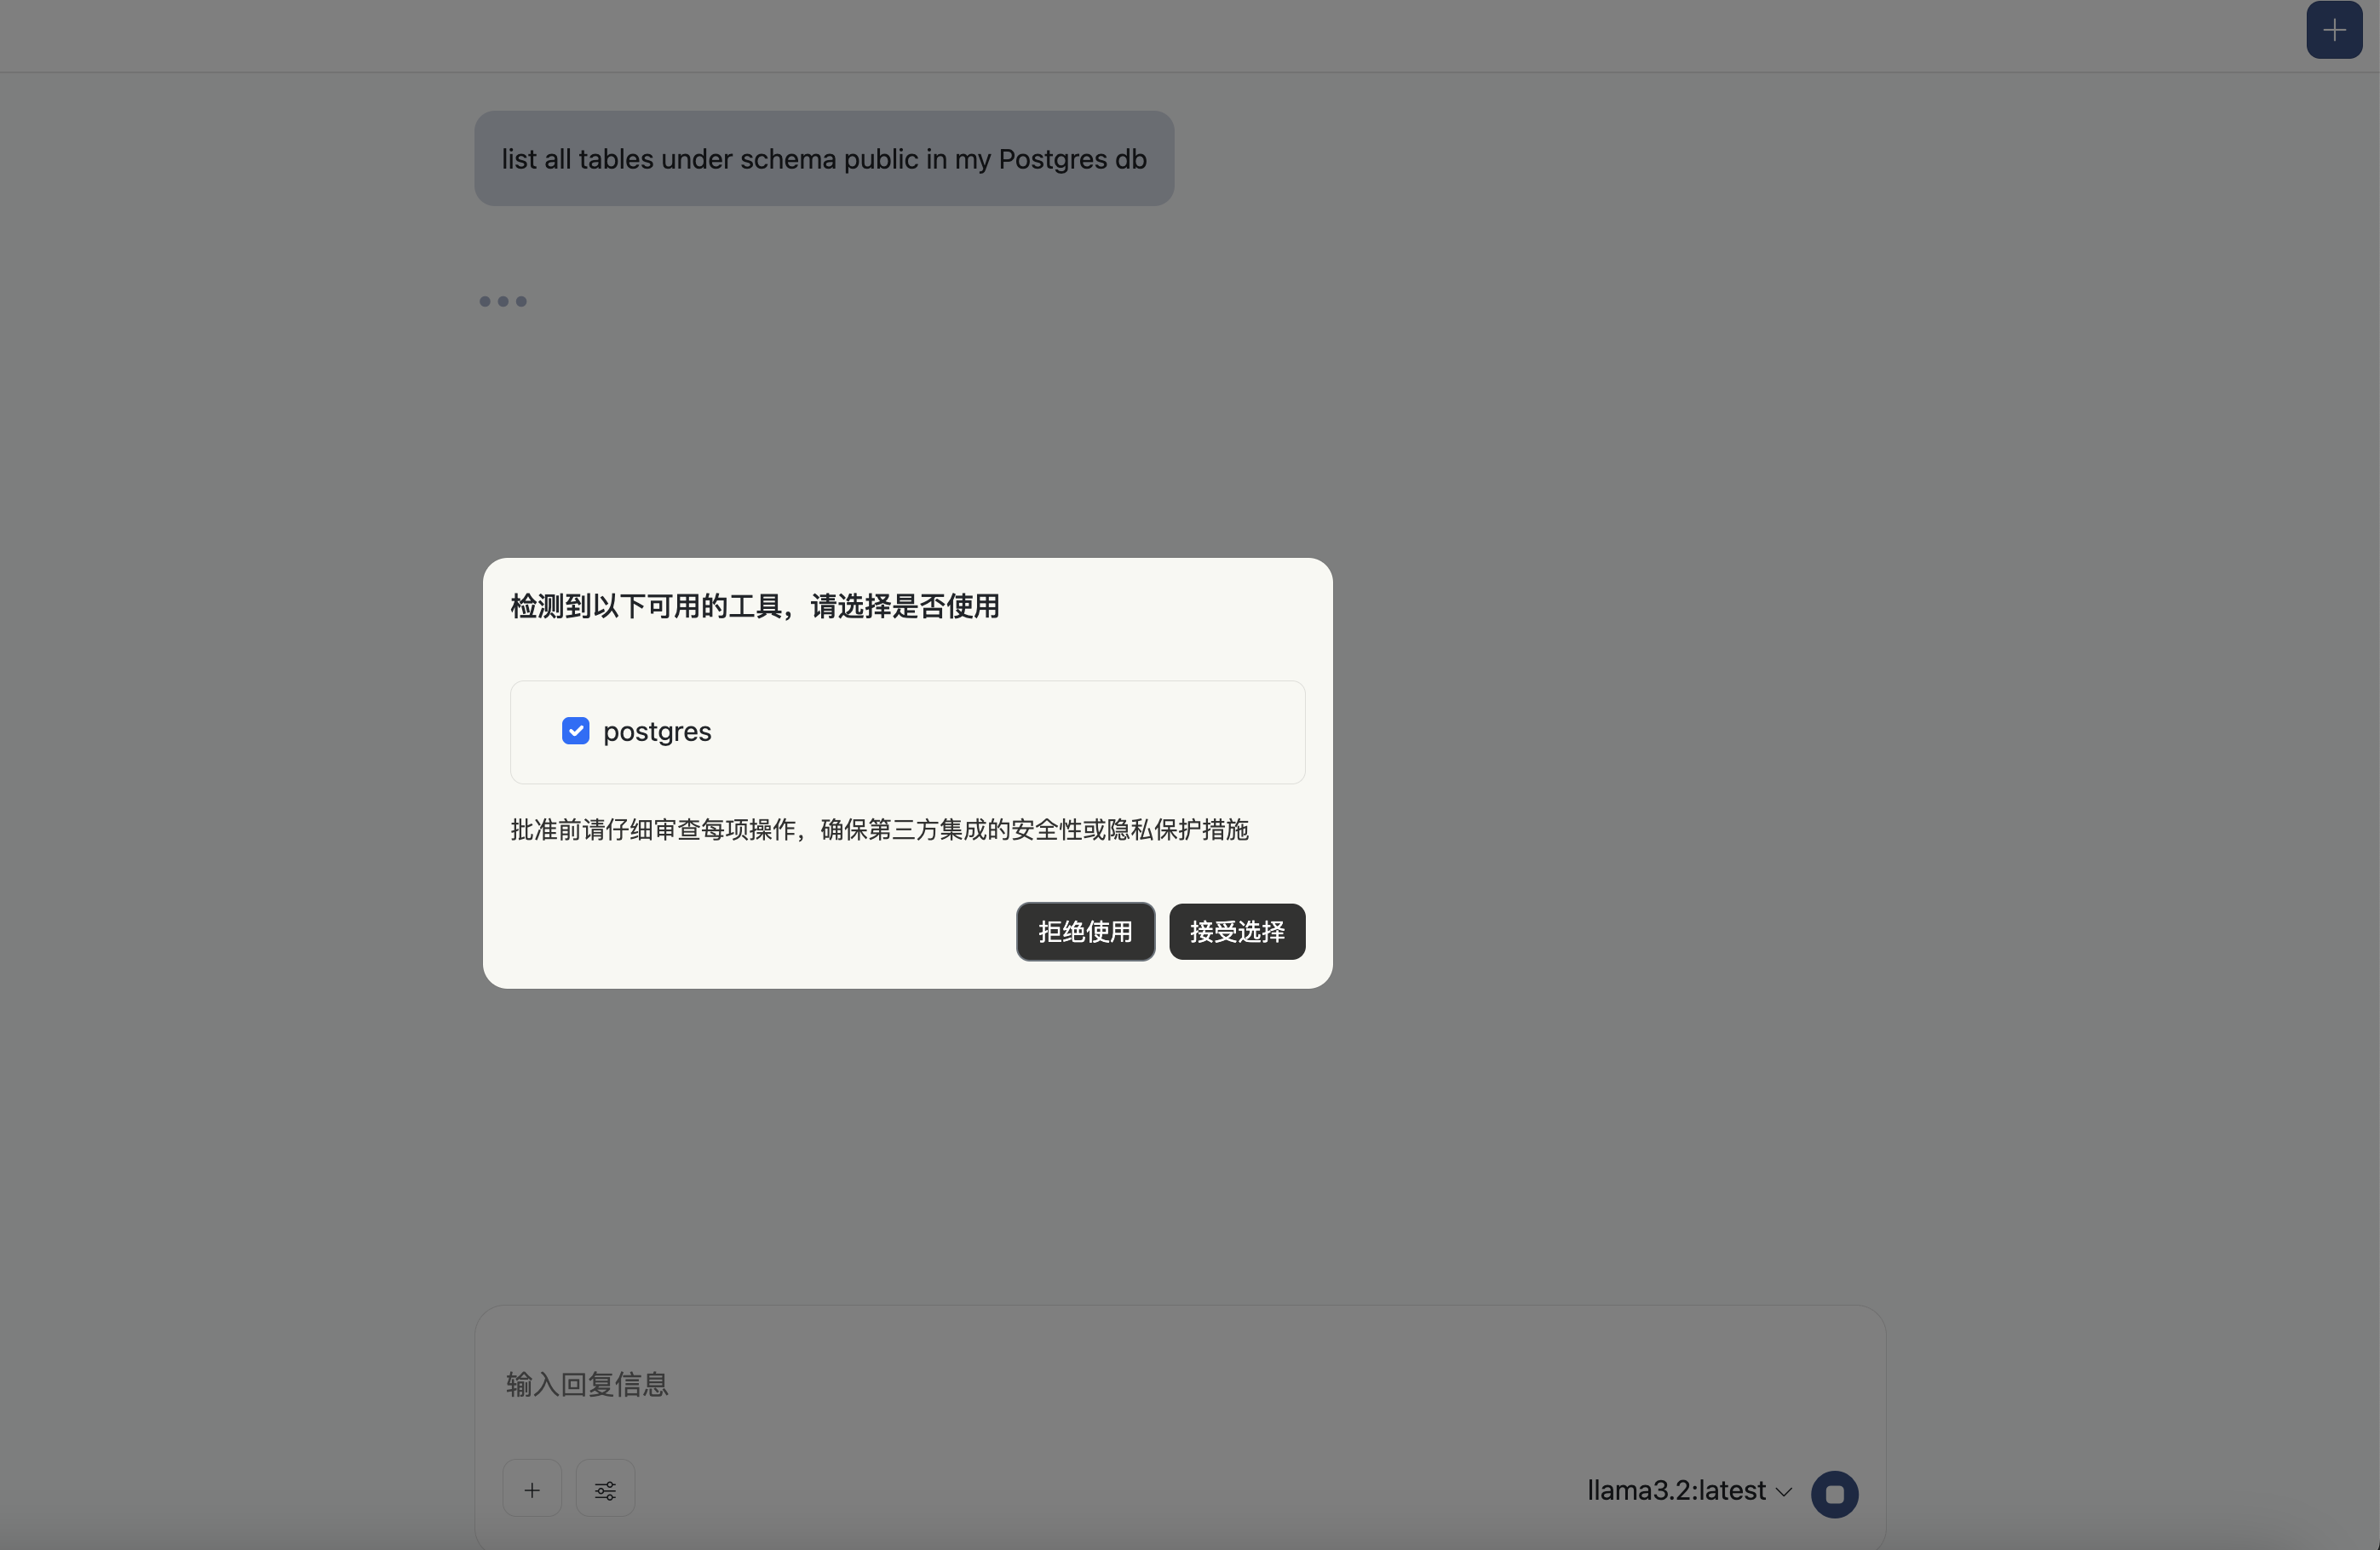
智能体会根据问题匹配到适合使用的MCP工具,您可以通过点击接受选择来使用相应的工具
问题答案输出:
配置使用RAG
RAG,即:检索增强生成(Retrieval Augmented Generation),通过自有垂域数据库检索相关信息,然后合并成为提示模板,给大模型润色生成回答。
准备数据
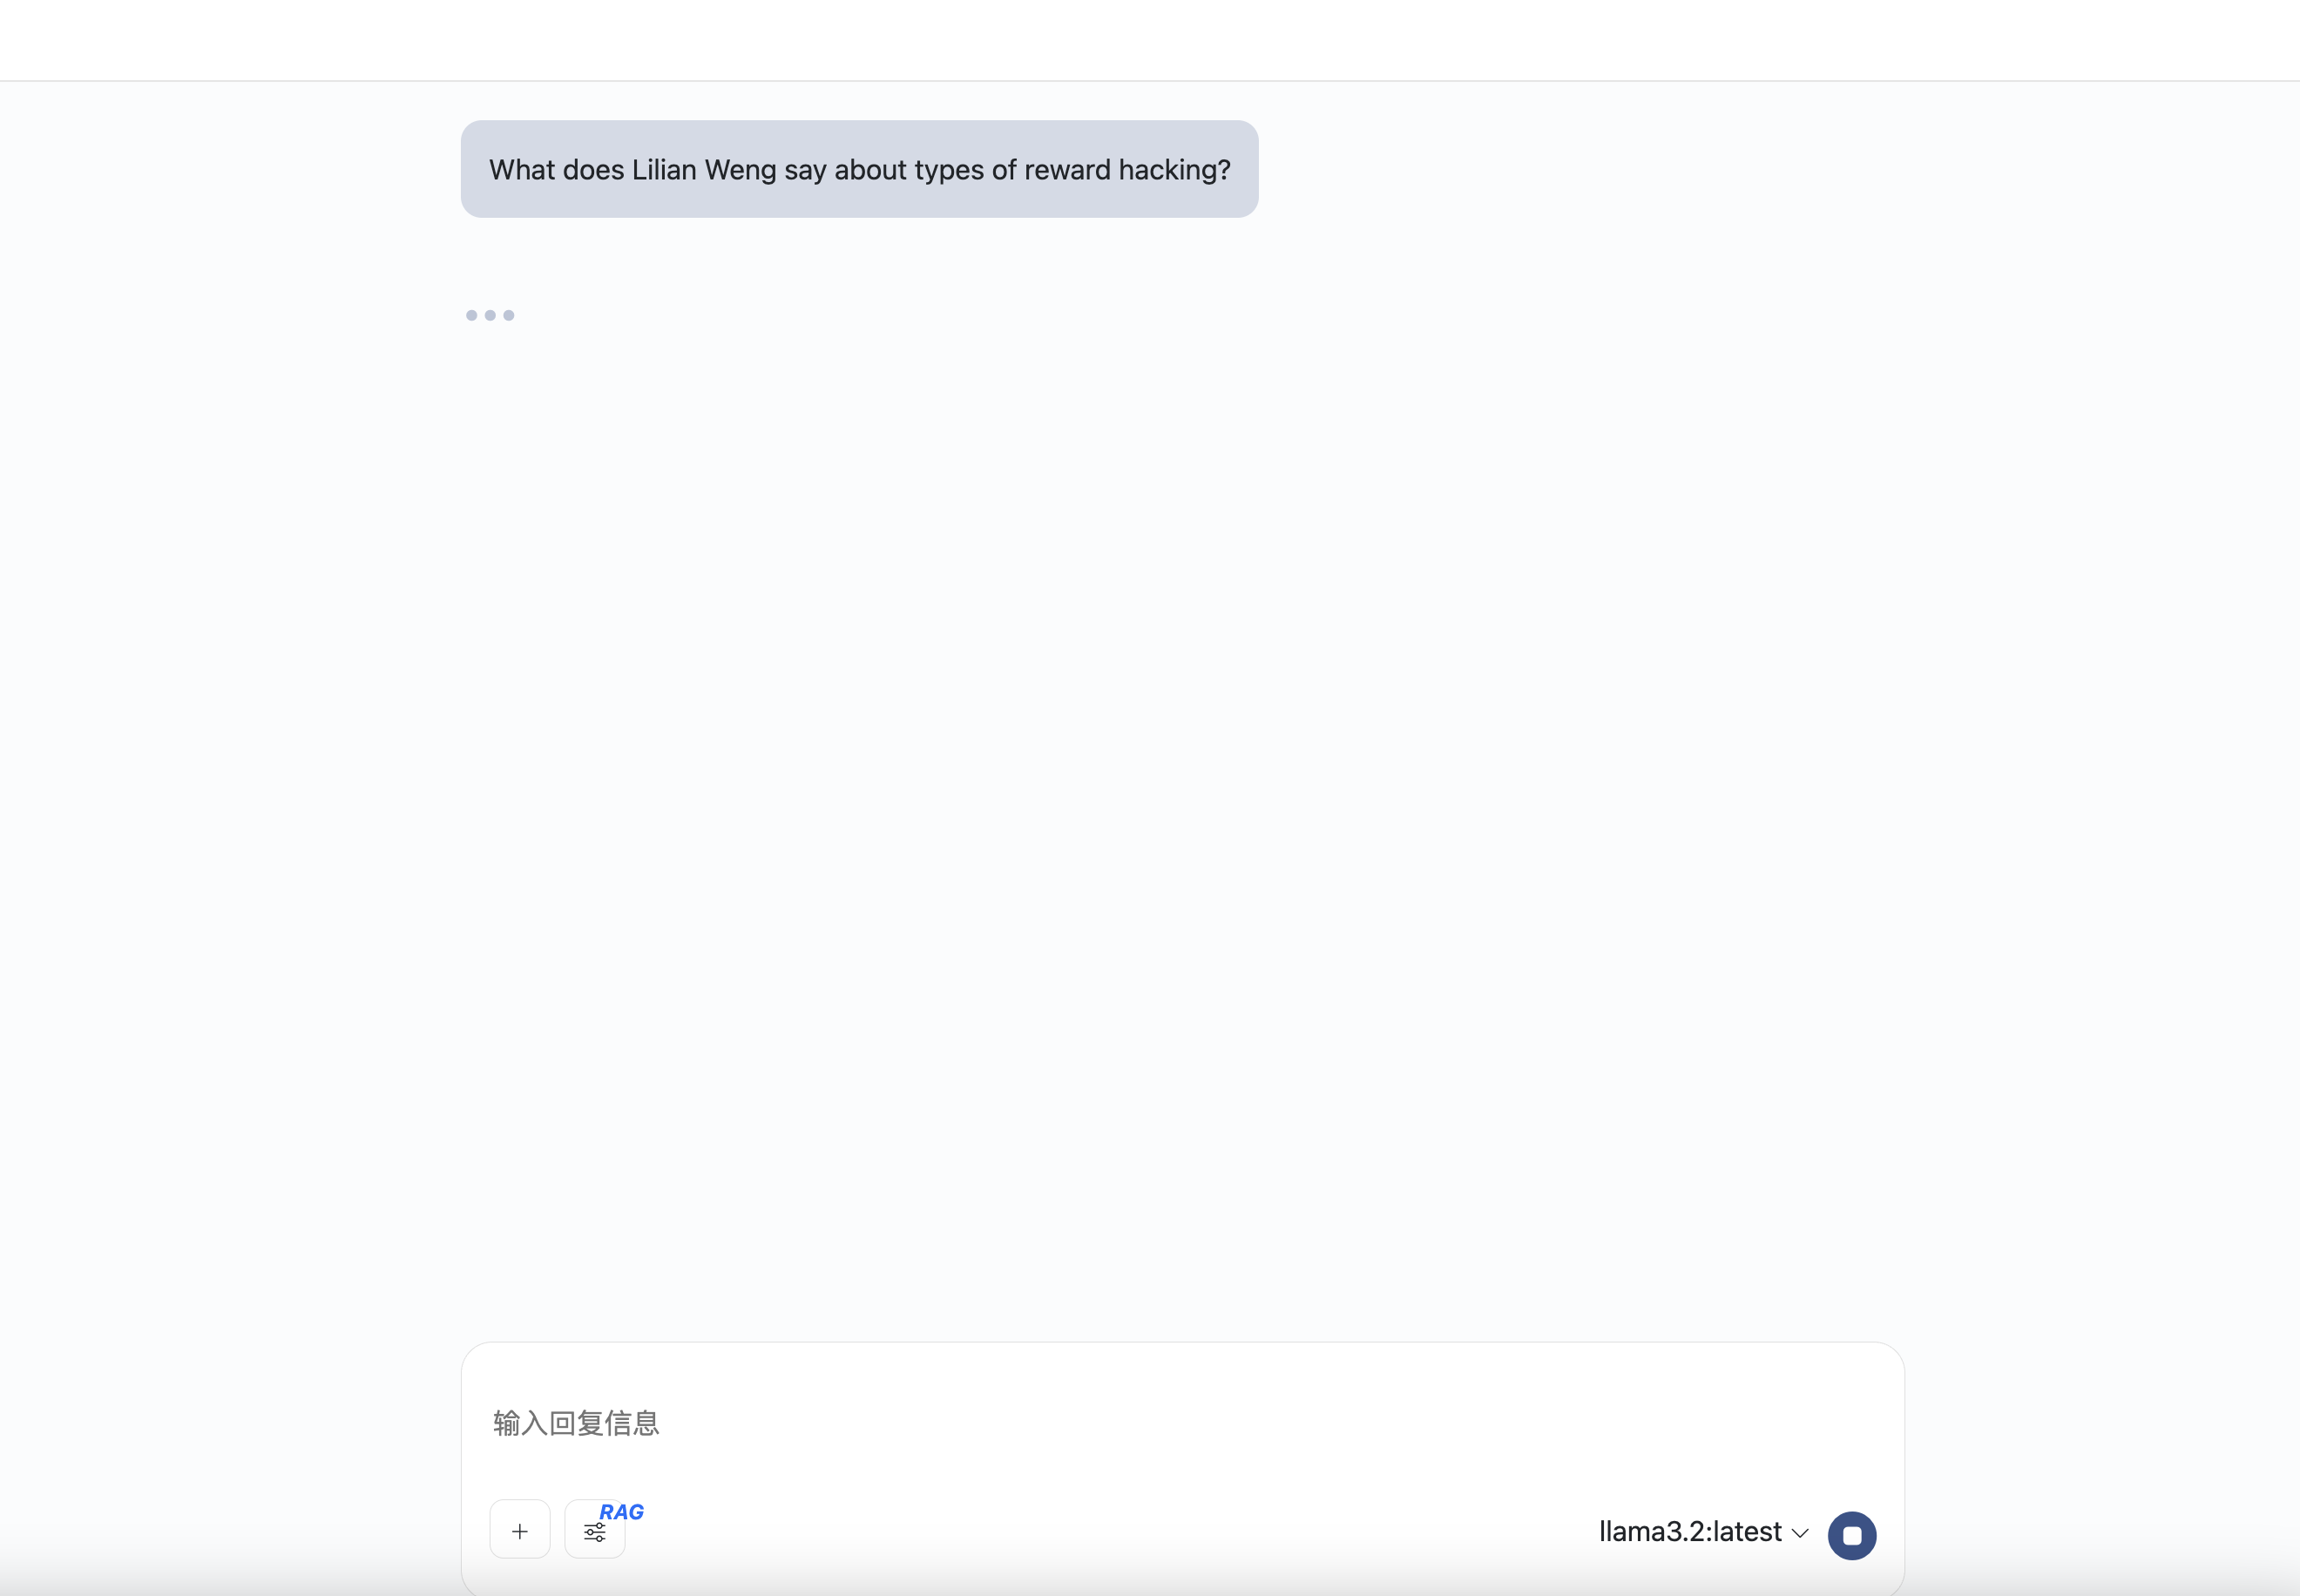
演示中,我们把Lilian Weng的几篇博客向量化之后存储到向量数据库中,然后我们会基于博客提及的内容进行提问,模型会使用向量数据对生成的结果增强。
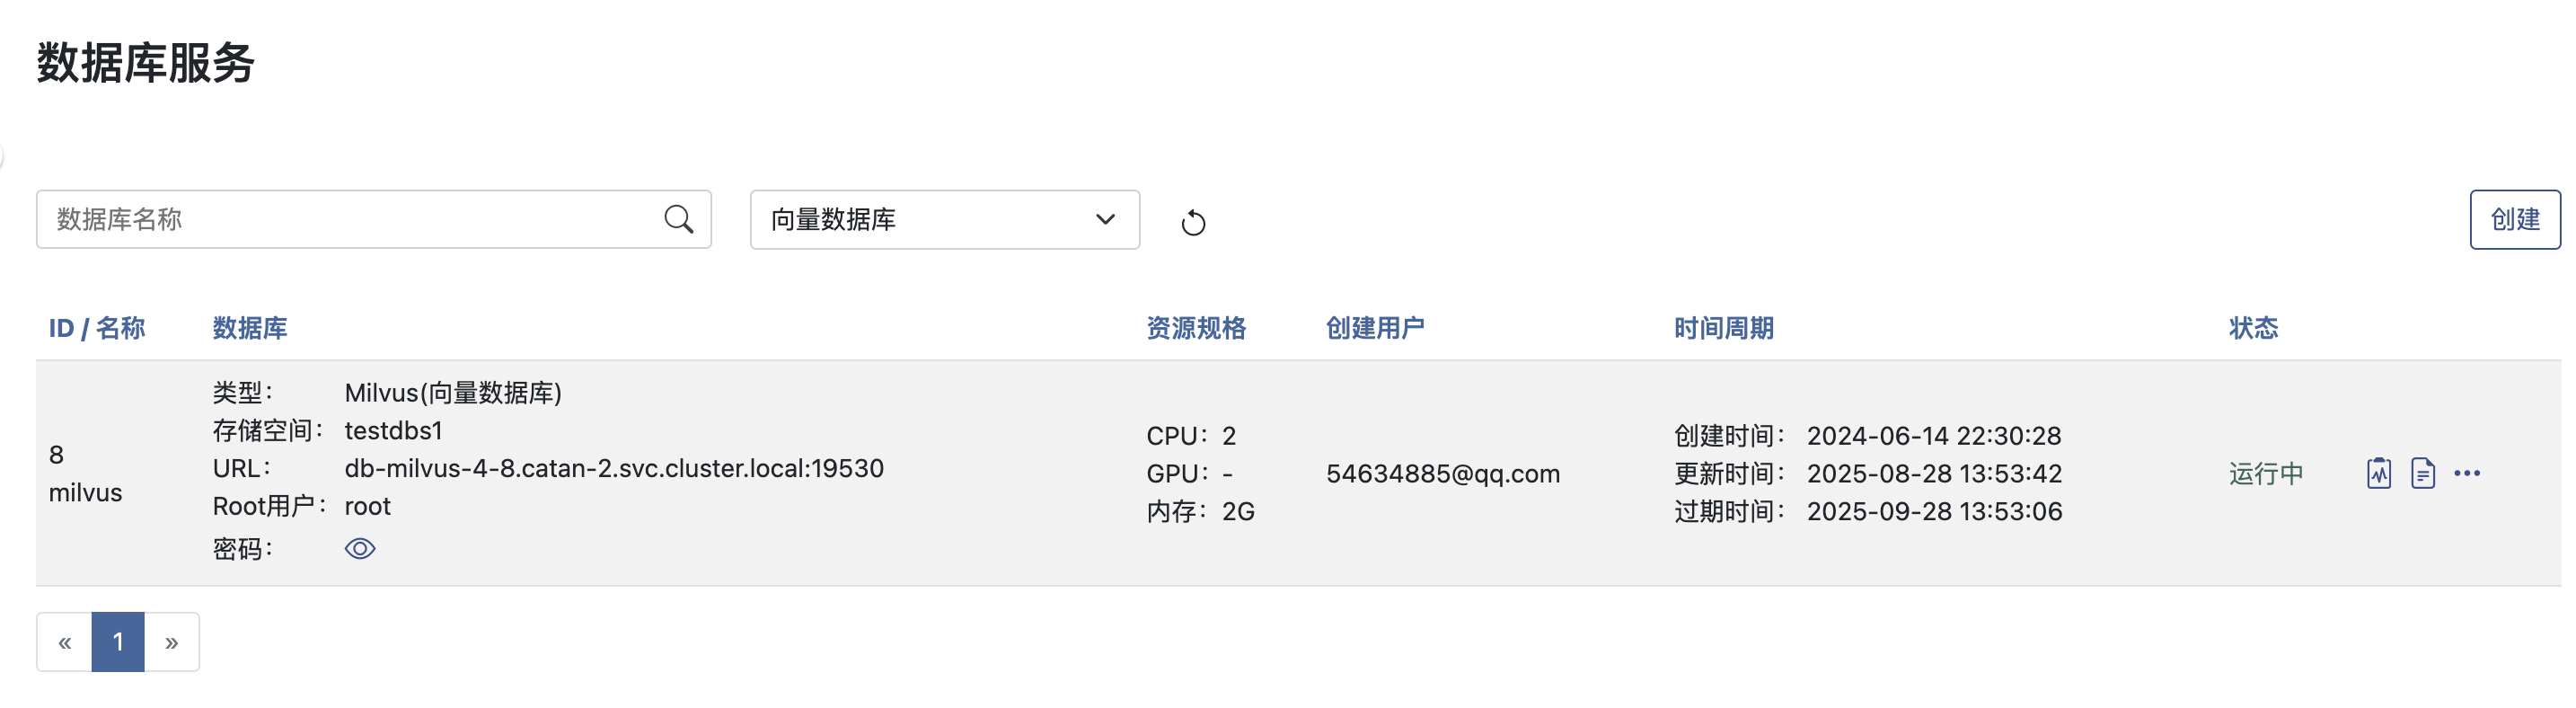
首先,我们先开通一个向量数据库服务。
接下来,我们使用Notebook读取博客内容,切片向量化存储到数据库中。
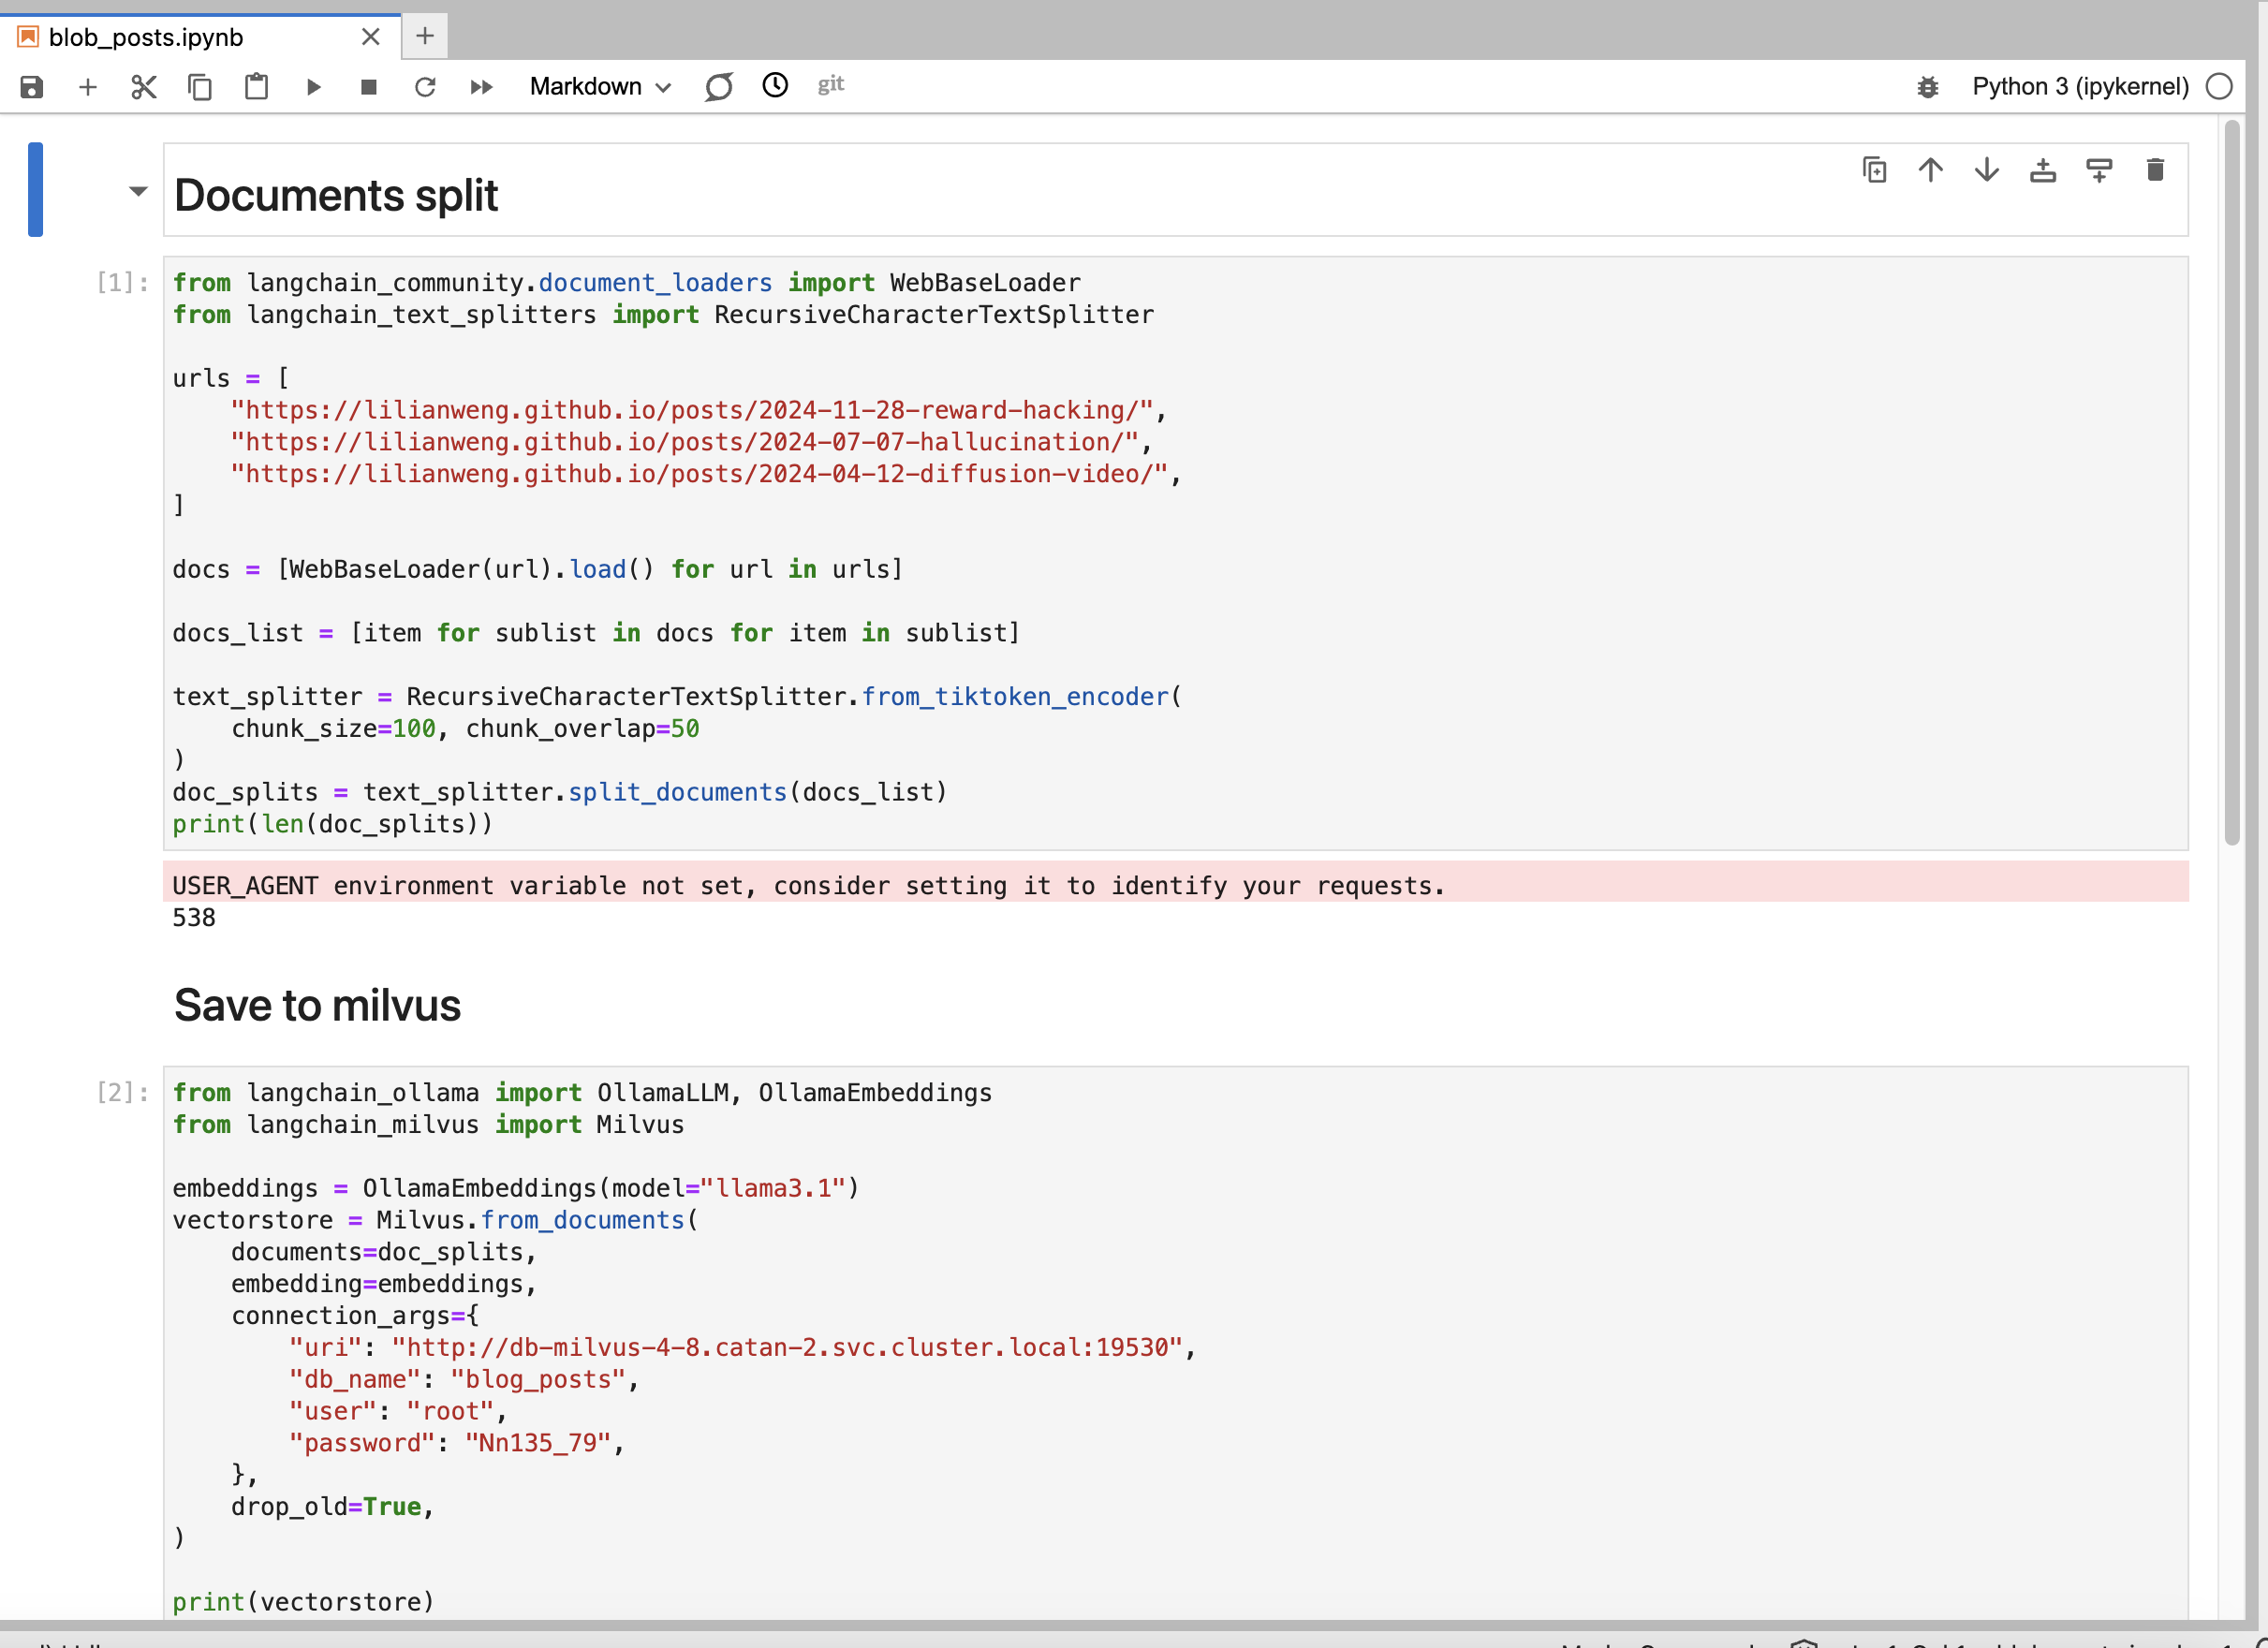
from langchain_community.document_loaders import WebBaseLoader
from langchain_text_splitters import RecursiveCharacterTextSplitter

urls = [
    "https://lilianweng.github.io/posts/2024-11-28-reward-hacking/",
    "https://lilianweng.github.io/posts/2024-07-07-hallucination/",
    "https://lilianweng.github.io/posts/2024-04-12-diffusion-video/",
]

docs = [WebBaseLoader(url).load() for url in urls]

docs_list = [item for sublist in docs for item in sublist]

text_splitter = RecursiveCharacterTextSplitter.from_tiktoken_encoder(
    chunk_size=100, chunk_overlap=50
)
doc_splits = text_splitter.split_documents(docs_list)
from langchain_ollama import OllamaLLM, OllamaEmbeddings
from langchain_milvus import Milvus

embeddings = OllamaEmbeddings(model="llama3.1")
vectorstore = Milvus.from_documents(
    documents=doc_splits,
    embedding=embeddings,
    connection_args={
        "uri": "http://db-milvus-4-8.catan-2.svc.cluster.local:19530",
        "db_name": "blog_posts",
        "user": "root",
        "password": "Nn135_79",
    },
    drop_old=True,
)
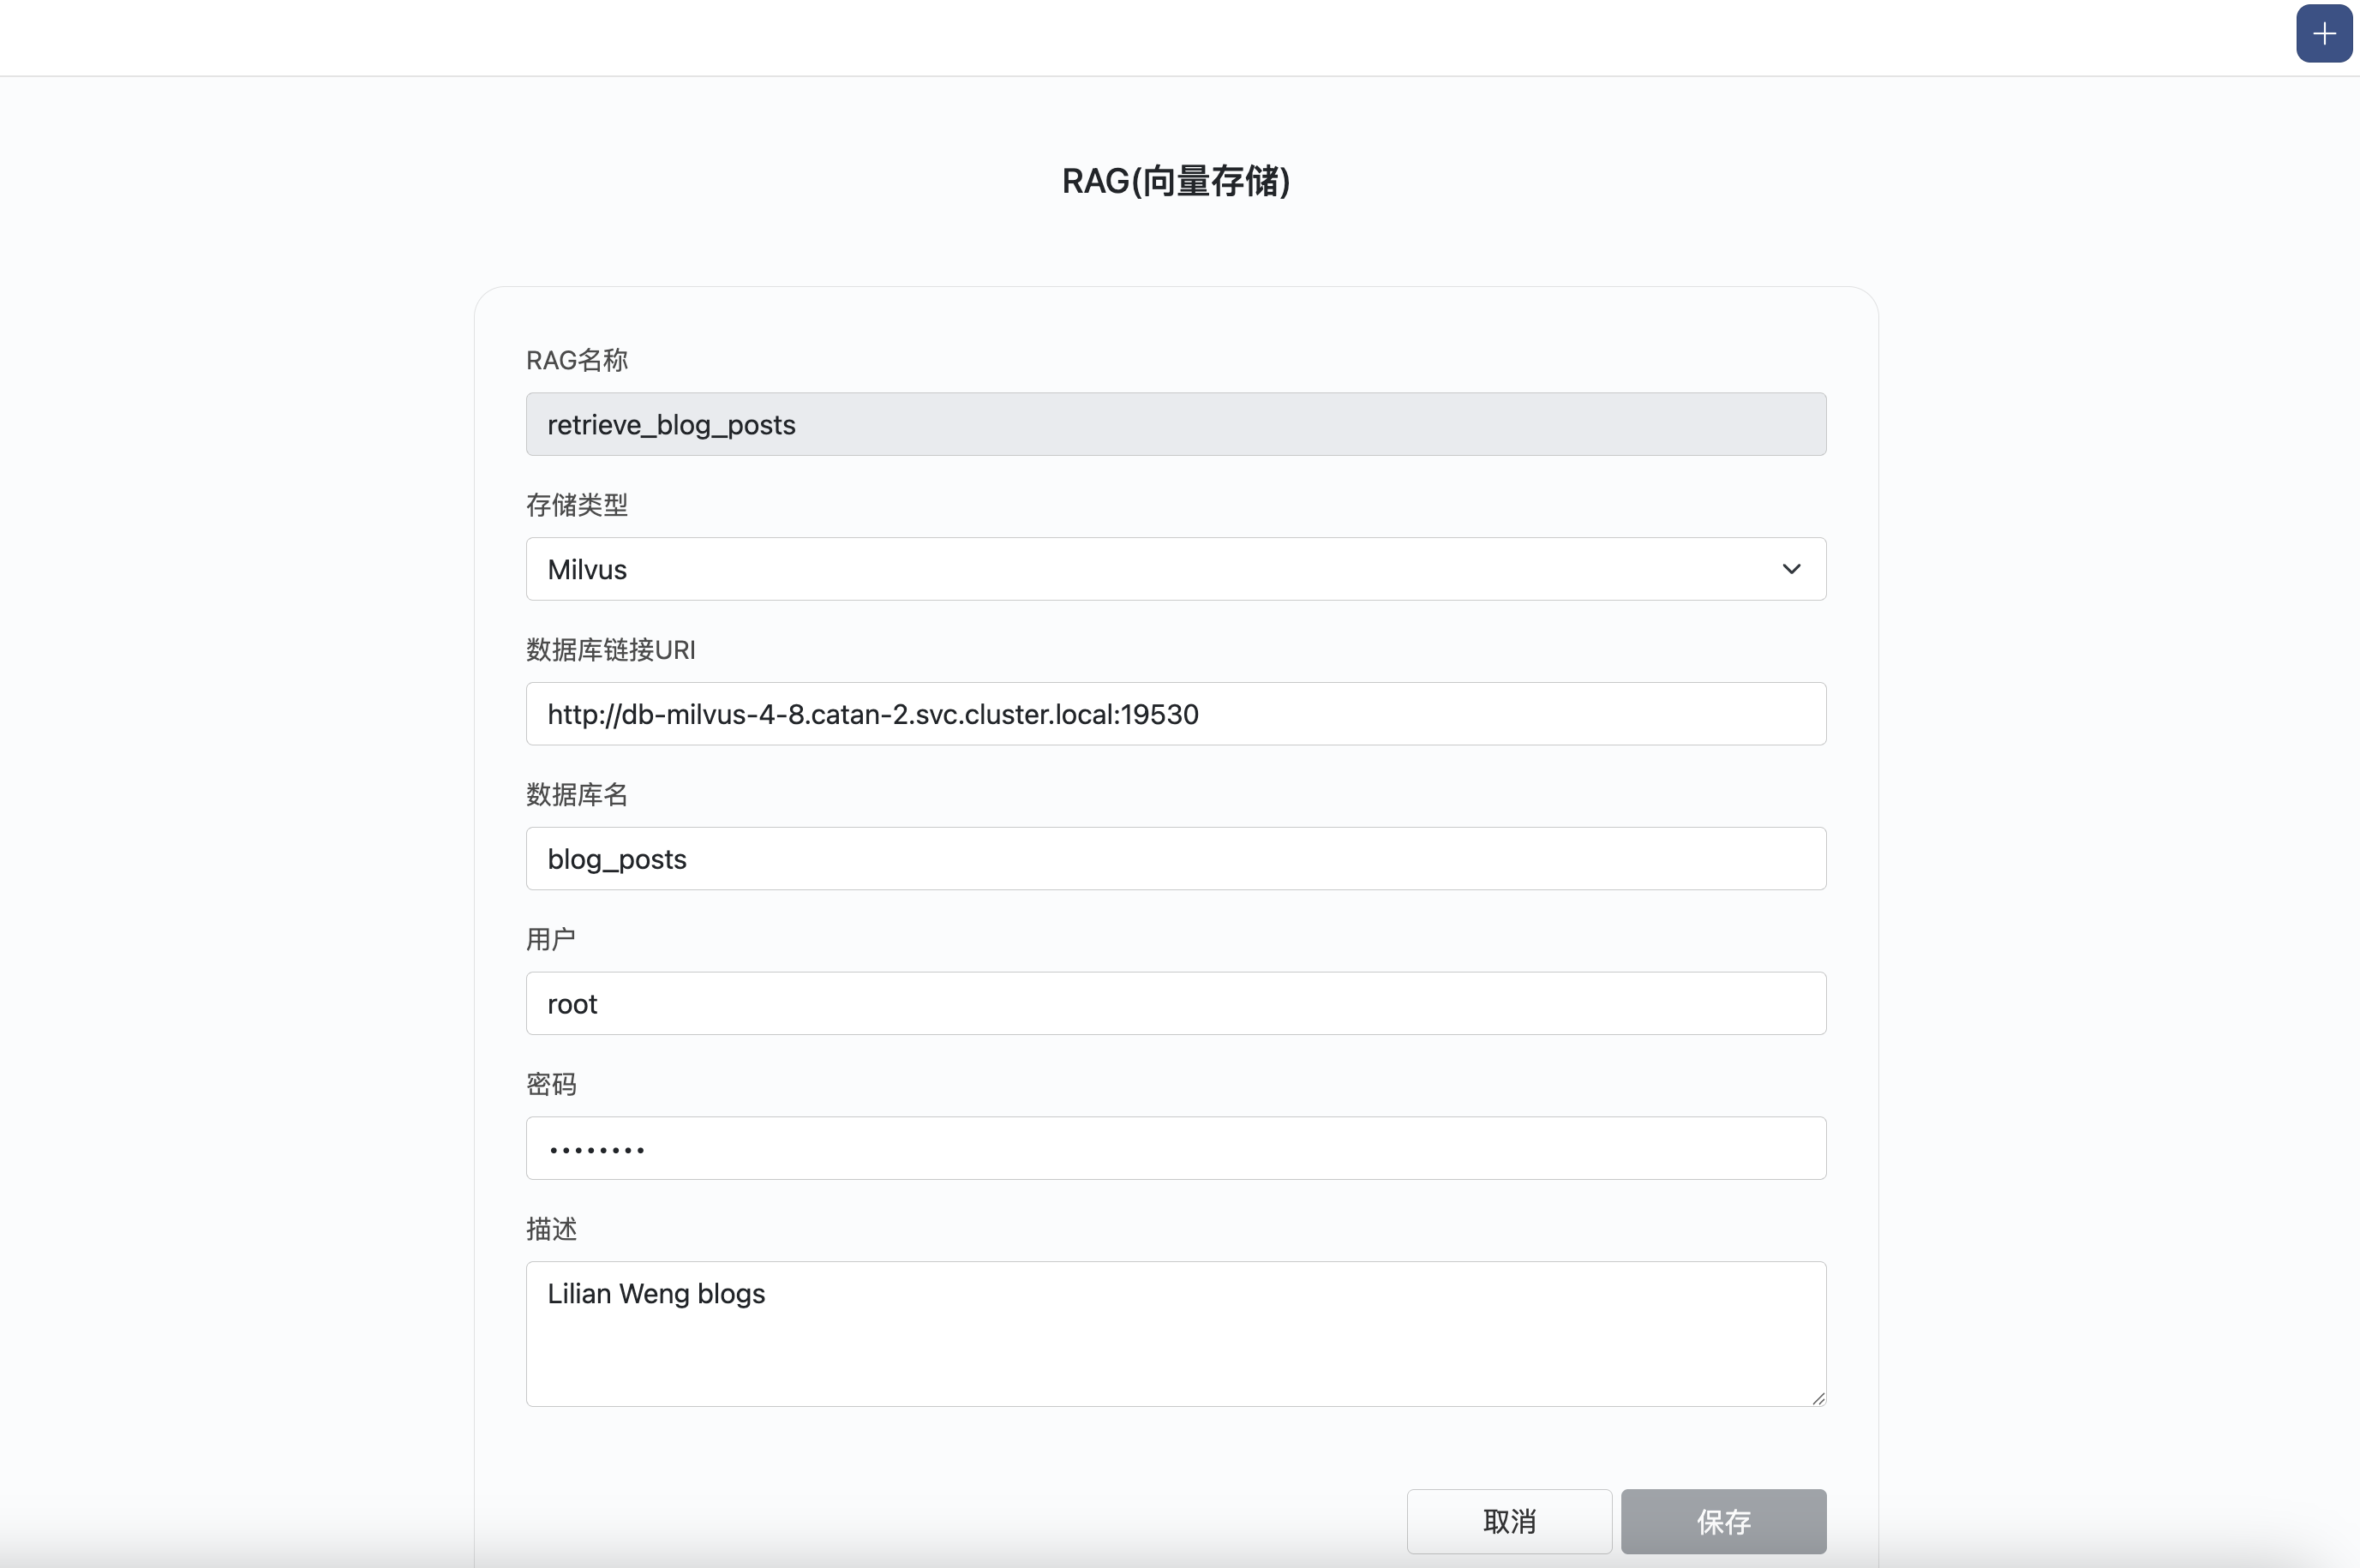
配置RAG
使用向量数据库的相关信息,配置RAG
使用RAG
选择RAG工具,然后对智能体进行提问。
这是回答的结果: